Clash of Critters/Best Teams
Clash of Critters Best Teams
There's no single best team in Clash of Critters — you adapt your deployment to each stage's Zobo elements. Treat every comp below as a core to build around, plus flex slots for coverage.
AHorde Invasion — standard meta coreHorde Invasion (2-player) Cheerspring (Cheerling)
 Waveflutter (Dewgrub)
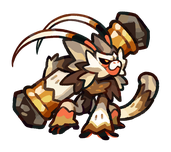 Rockwu (Punchimp)
 Zapantler (Voltfawn)
 Tideon (Droppit)
 Sonarbat (Zaplet)
 Solaflora (Buddi)
 Pandarrior (Pandaroo)
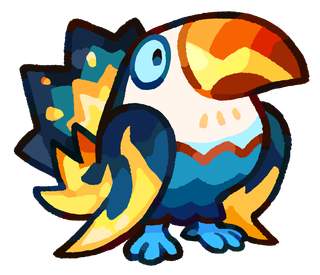 Toucanzam (Sparkeet)
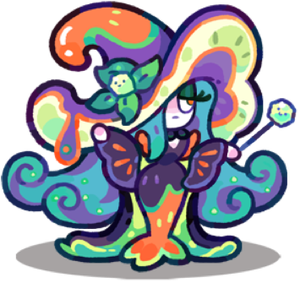 Ecstamira (Funglet)
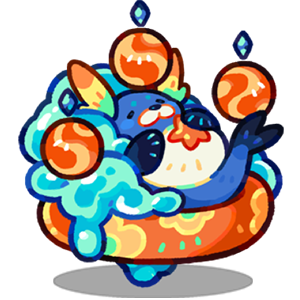 Sealord (Sealing)
The picks nearly every high-scoring Horde pair runs. Bring these, then fill the rest of your deployment with element coverage for the wave you're facing.
▼ Zobos advance down the lanes
Zapantler (Voltfawn)Pierce DPS — up front for the Lightning position buffToucanzam (Sparkeet)Front-row Lightning bufferFlex holderManteeny or an Ignitoad front-linerRockwu (Punchimp)Main DPS — hits three lanes from one unitSonarbat (Zaplet)Wide Fragile spreader; do the bat-swapFlexSecond holder / element coverageTideon (Droppit)Slow + Fragile across the lanesCheerspring (Cheerling)Core support — dead centre, towers around itEcstamira (Funglet)Spore field — Fragile + ally ATK/speed▲ Your base
Open this comp in the Team Builder →
Full pick list & why
- Cheerspring (Cheerling) · mid, dead centreCore support — AoE heal, ATK/DEF buff, periodic invincibility
- Waveflutter (Dewgrub) · back, in its own wave bubblesTeam CC — Sleep/Slow that adjacent AoE allies re-spread
- Rockwu (Punchimp) · mid / backMain DPS — one lane of damage becomes three via clones
- Zapantler (Voltfawn) · front, for the Lightning position buffPiercing lightning DPS + Paralyse; strong into the Water bosses
- Tideon (Droppit) · midDebuff — three-lane Slow + Fragile
- Sonarbat (Zaplet) · midFive-lane Fragile spreader; do the bat-swap so both teams get the damage buff
- Solaflora (Buddi) · back, against the wallExtra healing + screen-wide stun; run one or two against the wall
- Pandarrior (Pandaroo) · midATK-speed / ATK boost + damage-reduction aura — run one, not two
- Toucanzam (Sparkeet) · frontFront-row Lightning buffer — supercharges nearby Lightning units
- Ecstamira (Funglet) · midSpore field — Fragile on enemies, ATK/speed buff + damage reduction for allies
- Sealord (Sealing) · backWater DPS + Weak debuff; sit it in Waveflutter's wave, not against the wall
- The board is a sensible arrangement — creators pin Cheerspring dead centre, Waveflutter behind it, Solaflora against a wall and the Lightning units up front, and leave the rest to taste. The empty slots are for element coverage against the wave you're facing.
- There is no single "best team" in Clash of Critters — every Horde wave and every stage throws a different mix of Zobo elements, so you adapt your deployment to what's attacking. This list is the reliable spine; the flex slots are element coverage.
- Cheerspring and Waveflutter are treated as mandatory on both players' sides. Get Waveflutter to Tier 3 first — it does almost nothing below that.
- The "bat-swap": each player drops their Sonarbat on the ally's side so both teams pick up its damage boost.
- Only run one of each buff/aura unit (Pandarrior, Solaflora past two, Ecstamira, Ashlarva) — most of those effects don't stack with a second copy.
- Dojo badges, feed level and star level move the needle more than pushing one extra evolution tier — invest there before rushing a T4.
- Two independent recent Reddit reports (r/ClashofCritters) say Rockwu (Punchimp) and Toucanzam (Sparkeet) took a Horde-specific balance pass and no longer carry Horde the way they used to — both are still worth running (one poster: "still meta everywhere else but not meta in horde"), just don't expect them to solo-carry a wave the way they do in campaign/bossing.
- The current top-voted community Horde formation (r/ClashofCritters, 96 upvotes, Sep 2026) gets by with Cheerlet (Cheerling T2) and Seaswirl (Sealing T3) rather than this comp's Cheerspring/T3 and Sealord/T4 — a viable lighter-investment version of this core if you haven't pushed those two lines that far yet.
Flex / subs: Manteeny or an Ignitoad (Poakie) front-liner to hold the line · Frostluna / Ice Cat for single-target Water damage · Ashlarva instead of / alongside Solaflora for the fire-square heal · Blitzmane (Zappur) as a front-line R1 with a damage-boost buff
AHorde Invasion — Butterfly + Toad (low investment)Horde Invasion (2-player)Waveflutter (Dewgrub) Ignitoad (Poakie)Cheerspring (Cheerling)Solaflora (Buddi)Tideon (Droppit)Rockwu (Punchimp)
A cheaper Horde comp that can reach roughly 900–1000 kills without deep investment, built around Waveflutter's CC and Ignitoad's lava.
▼ Zobos advance down the lanes
Ignitoad (Poakie)A second one widens the burn (if you have the copies)Ignitoad (Poakie)Lava zone — needs to be up front▲ Your base
Open this comp in the Team Builder →
Full pick list & why
- Waveflutter (Dewgrub) · front / back bubblesThe engine — Sleep/Slow the whole front, works at Tier 2–3
- Ignitoad (Poakie) · frontMain damage — a large lava/oil zone that keeps burning, plus an AoE stun and a teleport
- Cheerspring (Cheerling) · mid, centreHeal + buff + invincibility
- Solaflora (Buddi) · back, against the wallSecond healer / stun
- Tideon (Droppit) · midSlow + Fragile so the burn does more
- Rockwu (Punchimp) · mid / backFiller DPS if you have it
- This is a different playstyle to the standard meta comp, not a replacement for individual picks in it — Ignitoad makes its own formation rather than slotting into the usual one.
- It works because Ignitoad's Tier-3 level-7 skill drops a big burning zone in front of you, and Waveflutter keeps everything in that zone slept and slowed while it cooks.
- You don't need both a grass frog (Frugagon) and the fire toad — the toad here is Ignitoad (Poakie), the Fire line.
- Push feed level and star level on Waveflutter and Ignitoad before spending on a new evolution tier.
- Same Horde-specific nerf report as `horde-meta-core` applies to Rockwu (Punchimp) here — still usable, just not the stand-out pick it is outside Horde.
- If Poakie isn't at Ignitoad (T4) yet, recent Reddit formations (r/ClashofCritters) get real use out of Sizzribb (T2) instead — this comp's own build is themed around Poakie's full kit, but T2 keeps the slot functional in the meantime.
Flex / subs: Manteeny as a second front-liner · Sonarbat (Zaplet) for extra Fragile · Any Tier-2 healer you already have instead of Solaflora
AIsland Goldrush — DPS coreIsland Goldrush Clawzor (Cribbler)
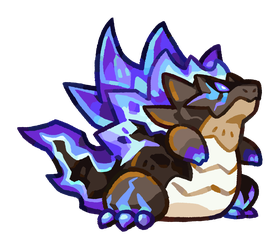 Meteorax (Rubblet)
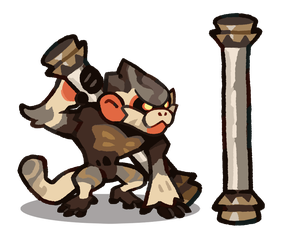 Rockong (Punchimp)
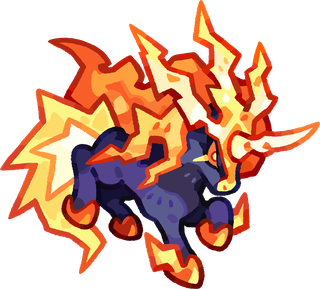 Boltallion (Zapuni)Zapantler (Voltfawn)Cheerspring (Cheerling)
 Lightning×3
 Rock×2
Goldrush rewards raw arena damage and team Auras. This is the group creators build their Goldrush formations around.
▼ Enemies advance down the lanes
Clawzor (Cribbler)Damage king — hard left so the claw sweeps acrossMeteorax (Rubblet)Rock tank + Rock Aura▲ Your base
Open this comp in the Team Builder →
Full pick list & why
- Clawzor (Cribbler) · front, hard leftThe Goldrush damage king — one claw does most of the team's output; applies Shredded
- Meteorax (Rubblet) · frontRock tank + the Rock Aura, one of the best team buffs in Goldrush — worth taking to T4 (Meteorax)
- Rockong (Punchimp) · midThree-lane AoE DPS + a second Rock Aura at T4
- Boltallion (Zapuni) · mid / backLightning DPS + Lightning Aura (attack speed) — best when highly invested / at T4
- Zapantler (Voltfawn) · backSecond Lightning carry to stack the attack-speed Aura
- Cheerspring (Cheerling) · midHealer where the round calls for one
- Auras are the single biggest long-term investment for Goldrush — the Rock Aura and the Lightning attack-speed Aura are the ones to chase. That means taking those lines to Tier 4.
- Cribbler ("the crab") is close to irreplaceable here — no other unit's DPS comes near it in most Goldrush situations.
- Godzilla (Rockzilla) also shows up in story stages and the Dojo — it's a genuine all-rounder outside of Boss Challenge and Horde.
- Power in Goldrush is calculated at a fixed Tatari level (Lvl 500), so star level, evolution and Aura matter far more than your account level.
Flex / subs: Stormlion (Zappur) for the Lightning Aura plus a damage-boost buff · Ashlarva instead of Cheerspring for a fire-square healer · A Grass carry (Frugagon or Thornwisp) for lanes stacked with Rock Zobos
ABoss Challenge — sustained-damage coreBoss Challenge Dreadclaw (Cribbler)Pandarrior (Pandaroo)Meteorax (Rubblet)Cheerspring (Cheerling)
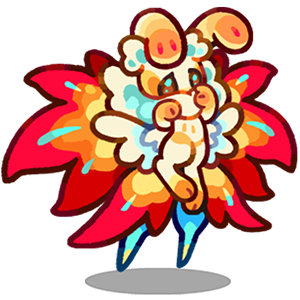 Chrysolaria (Ashlarva)
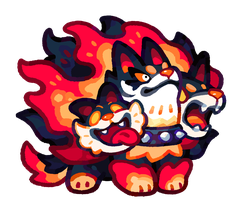 Pyrodaemon (Pyropup)
Rock×2Boss Challenge is a long fight against one big health bar with mixed-element adds, capped at a fixed Tatari level so food, stars, badges and formation decide it. The core is one two-lane carry, a debuffer that scales the longer the fight runs, an Aura tank and doubled healing.
▼ Boss and mixed-element adds advance down the lanes
Dreadclaw (Cribbler)Carry — hard left so the claw sweeps into lane 2Meteorax (Rubblet)Rock tank + Rock AuraPyrodaemon (Pyropup)Guardian — holds the add lane, Weak debuffPandarrior (Pandaroo)Ramping bamboo damage + Slow▲ Your base
Open this comp in the Team Builder →
Full pick list & why
- Dreadclaw (Cribbler) · front, hard leftMain carry — hits its own lane and the lane to its right, and applies Shredded so the boss takes more from everything else. T3 gives it an ATK boost every time it's healed, which pairs with the two healers
- Pandarrior (Pandaroo) · midThe scaler — its bamboo shoots deal steady damage that grows the longer they stay planted, so its output climbs across a drawn-out boss bar; also Slows
- Meteorax (Rubblet) · frontRock tank plus the Rock Aura (team-wide damage reduction) — the single best survivability buff for a fight this long. Worth taking to T4
- Cheerspring (Cheerling) · mid, dead centreCore support — AoE heal, ATK/DEF buff, and the periodic invincibility window that saves the run when the boss spikes
- Chrysolaria (Ashlarva) · back, against a wallSecond healer — its fire ring heals allies standing in it while chipping the boss, so healing throughput keeps up with the boss's ramp without spending a damage slot on a pure medic
- Pyrodaemon (Pyropup) · frontFront Guardian body with a Weak debuff and a fire pillar — holds the lane the adds pour down so the carry never gets touched
- There is no single 'best team' in Clash of Critters — Boss Challenge floors mix Zobo elements and the game flags each lane green or red on the element cycle (Lightning > Water > Fire > Grass > Rock > Lightning). This is a reliable spine; the flex slot and any spare deployment room are for the countering element of the floor in front of you.
- This is a labeled synthesis of loadoutgg's own material — the Boss Challenge section of the Badge Dojo & Modes guide (fixed Tatari-level cap, mixed elements, green/red lane flags), the Aura advice from the Economy & Auras guide (Rock Aura = team damage reduction), and each Tatari's own skill on its loadoutgg page (Cribbler's two-lane hit + Shredded + heal-triggered ATK, Pandaroo's ramping shoots, Ashlarva's healing ring). Community creators consistently describe the same 'tank + sustained carry + support/healer + Aura' shape.
- Because power is capped at a fixed Tatari level here, food grade, star level and Dojo badges on these six move the needle far more than pushing one of them an extra evolution tier.
- Run only one of each Aura or buff unit — a second Rubblet doesn't stack the Rock Aura.
Flex / subs: Rockong (Punchimp) for a second Rock Aura at T4 and three-lane add clear · Solaflora (Buddi) instead of Ashlarva for a Grass-square healer with an ATK buff · Sonarbat (Zaplet) in the flex lane for wide Fragile if the boss floor is a pure single-target race
AGrass counter deck — Rock-heavy lanesCampaign / Boss Challenge · Rock-element stages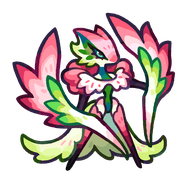 Orchitoria (Manteeny)
 Frugagon (Frugling)Pandarrior (Pandaroo)
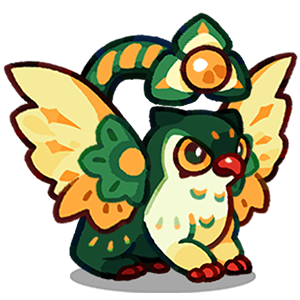 Chronerva (Hootlet)Solaflora (Buddi)Ecstamira (Funglet)
 Grass×5
The coverage deck you slot in when a stage or boss floor stacks Rock Zobos in the lanes and your main team's lanes flag red. Grass beats Rock for 200% damage, so an all-Grass block turns those red lanes green.
▼ Rock Zobos advance down the lanes
Orchitoria (Manteeny)Grass tank + AoE — front-holds the heaviest Rock laneOrchitoria (Manteeny)A second front-liner if the stage is all-Rock across every lane▲ Your base
Open this comp in the Team Builder →
Full pick list & why
- Orchitoria (Manteeny) · frontGrass tank + repeated AoE — with one healer behind it, it can hold a Rock lane on its own
- Frugagon (Frugling) · midMain Grass DPS — its prickly fruit bursts for area damage; the S-tier Grass carry to build
- Pandarrior (Pandaroo) · midRamping bamboo damage plus a lane Slow to hold the Rock advance while Frugagon works
- Chronerva (Hootlet) · 2ndSupport — lays a damage zone in front that stacks Slow, compounding with Pandaroo so the Rock line barely moves
- Solaflora (Buddi) · backGrass healer — sunlight heal plus a Sunshine ATK boost, keeping Manteeny up and buffing the carries
- Ecstamira (Funglet) · midSpore field — Fragile on the Rock Zobos and an ATK/speed buff for the Grass allies standing in it
- Built straight from Clash of Critters' own element cycle as documented on loadoutgg's How It Works page: Grass beats Rock (200% damage dealt, and Rock only does 50% back). During deployment the game flags each lane green or red on this cycle — this deck is what you drop into the red Rock lanes.
- It's a labeled synthesis: the roster is every Grass unit whose loadoutgg skill page gives it a clear role in a holding block (Manteeny tank/AoE, Frugling burst, Pandaroo + Hootlet stacked Slow, Funglet Fragile, Buddi heal). No competitor 'best Grass team' page was used.
- Don't field this as your whole account — the game punishes single-element rosters. This is a swap-in block for the lanes that need it, run alongside your main team's other elements.
- Fire Zobos mixed into the same stage will shred these Grass units (Fire beats Grass), so check every lane's flag before committing — put a Water or Rock unit where Fire is coming down instead.
- Hootlet is pinned at Chronerva (T3) here for the slow/utility role this comp actually needs — the line's own tierNote flags real DPS as a T4 (Hypnostrix) extra, worth chasing later but not required for this comp's job.
Flex / subs: Cactobud for a Grass DPS that stacks Sting, or Budboo for Poison · Sackling as a second Grass tank with a Liquid Shield · Frugling copies over spreading into a fourth Grass line if you're short evolutions elsewhere
ALightning counter deck — Water bossesCampaign / Boss Challenge · Water-element stagesZapantler (Voltfawn)Boltallion (Zapuni)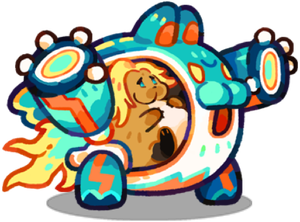 Gigagnash (Cavyzap)Toucanzam (Sparkeet)
 Stormlion (Zappur)Cheerspring (Cheerling)
Lightning×5The block to drop into a Water-heavy stage or a Water boss floor. Lightning beats Water for 200% damage, and Lightning's kit — pierce, Paralyse, attack-speed Aura — is built for punishing the slow, sustain-leaning Water Zobos.
▼ Water Zobos advance down the lanes
Zapantler (Voltfawn)Pierce + Paralyse — front for the Lightning position buffToucanzam (Sparkeet)Lightning tank + Charged ATK linkBoltallion (Zapuni)Splash DPS + Lightning attack-speed Aura at T4Gigagnash (Cavyzap)Electricage zone — chews clumped Zobos▲ Your base
Open this comp in the Team Builder →
Full pick list & why
- Zapantler (Voltfawn) · front, for the Lightning position buffMain carry — a piercing lightning lance that runs the whole lane and Paralyses, so a Water column gets hit once and frozen in place
- Boltallion (Zapuni) · midSecond DPS — a shock wave that splashes on impact, plus the Lightning attack-speed Aura at T4 that turns the whole deck's damage up
- Gigagnash (Cavyzap) · midArea lockdown — drops an Electricage zone then fires piercing signals into it, chewing through clumped Water Zobos
- Toucanzam (Sparkeet) · frontFront Lightning tank — links nearby Lightning allies for a Charged ATK boost and takes reduced damage itself
- Stormlion (Zappur) · 2ndSupport — a straight damage wave with Knockback to reset the Water advance, plus a damage-boost buff
- Cheerspring (Cheerling) · mid, centreHealer that's already Lightning — AoE heal, ATK/DEF buff and periodic invincibility without breaking the element block
- Straight off Clash of Critters' own element cycle (loadoutgg How It Works page): Lightning beats Water — 200% damage out, 50% back. This is the deck for the lanes that flag red with Water Zobos, including the Water boss floors the standard Horde note already calls out Zapantler for.
- Labeled synthesis: the five Lightning units are chosen for how their loadoutgg skill pages fit a punish block — Voltfawn pierce/Paralyse, Zapuni splash + Aura, Cavyzap zone, Sparkeet link-tank, Zappur knockback — with Cheerling as the one support that keeps the element intact. Not taken from any competitor team page.
- Keep Voltfawn and Sparkeet in the front row for the Lightning position buff, and take Zapuni to T4 for the attack-speed Aura — that Aura is most of this deck's damage ceiling.
- Rock Zobos mixed into the stage counter Lightning (Rock beats Lightning) — put a Grass or Water unit in any lane the flag shows red for Rock rather than forcing a Lightning unit there.
Flex / subs: Kittazap as a front Lightning Guardian whose punches ramp as enemies close · Voltmare (Zapuni) copies for a second attack-speed Aura carrier · Any highly-invested Lightning DPS you own in the mid lane — this deck scales with investment more than with the exact five
ABadge Dojo — Water tower pushBadge Dojo (Water)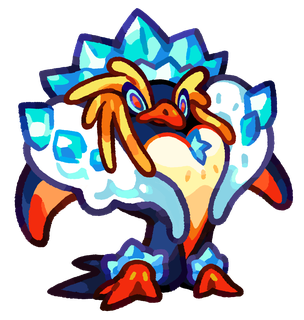 Glideflip (Waddledo)Clawzor (Cribbler)Tideon (Droppit)Sealord (Sealing)
 Frostluna (Frostnip)
 Somnrayna (Lullely)
 Water×6
The Badge Dojo is run one element at a time, so unlike every other mode you deliberately want a mono-element block here. This is a Water climb: a self-shielding tank wall, a two-lane carry, and stacked Slow so the floor never overruns you before the timer.
▼ The Water Dojo master's wave advances down the lanes
Glideflip (Waddledo)Ice-shield wallClawzor (Cribbler)Two-lane carry + ShreddedGlideflip (Waddledo)Second wall if all three lanes push▲ Your base
Open this comp in the Team Builder →
Full pick list & why
- Glideflip (Waddledo) · frontFront wall — gains an Ice Shield and, when it breaks, fires ice crystals for an area hit; on death it leaves an ice sculpture that buys a few more seconds
- Clawzor (Cribbler) · front, left of centreCarry — hits its own lane and the one to its right, and applies Shredded so the whole block's damage lands harder
- Tideon (Droppit) · midControl — a mist that keeps dealing area damage and Slows the lane, holding the Dojo wave back
- Sealord (Sealing) · midDPS — a ball that ricochets around the board plus a Weak debuff on what it hits
- Frostluna (Frostnip) · 2ndSecond control DPS — an ice block that Slows, stacking with Droppit so the front rank barely advances
- Somnrayna (Lullely) · backSustain — its sapping orb drains HP from healthy allies to hit harder and tops up hurt ones, covering the block's lack of a true Water healer
- This is the one place a single-element deck is correct: loadoutgg's Badge Dojo & Modes guide notes the Dojo is 'a tower challenge run separately per element', and clearing floors buys a badge that lifts every Tatari of that element account-wide — so you push the Dojo of the element your main team already runs, with that element's units.
- Labeled synthesis: the six Water picks are chosen from their loadoutgg skill pages for a stall-and-grind shape (Waddledo shield wall, Cribbler two-lane carry, Droppit + Frostnip stacked Slow, Sealing Weak, Lullely as the stand-in for the healer Water lacks). Not from a competitor team page.
- Dojo floors gate on how many evolved Water Tatari you own, so the roster and the climb advance together — you can't out-level the gate, only out-evolve it.
- Swap the element wholesale for whichever Dojo you're actually pushing — the structure (shield wall + two-lane carry + double Slow + one sustain unit) ports to Lightning, Grass, Fire or Rock.
Flex / subs: Maskfry for a Water support that Pulls the wave back off your wall · Dumbopus for extra Water AoE and an Octobuddy that hits on death · Frostluna / any invested single-target Water DPS over Sealing on the harder floors
AHorde Invasion — Fragile-stack ampHorde Invasion (2-player)Sonarbat (Zaplet)Tideon (Droppit)Ecstamira (Funglet)Sealord (Sealing)Clawzor (Cribbler)Cheerspring (Cheerling)Waveflutter (Dewgrub)
A third Horde archetype next to the standard meta core and the Ignitoad burn build: bring almost no raw damage and instead stack every enemy-weakening debuff in the game — Fragile, Weak, Shredded, Slow — so one modest carry deletes waves it normally couldn't touch.
▼ Zobos advance down the lanes
Clawzor (Cribbler)Carry — hard left, claw sweeps into lane 2Flex front-linerManteeny or an Ignitoad to hold the centre lane▲ Your base
Open this comp in the Team Builder →
Full pick list & why
- Sonarbat (Zaplet) · midFive-lane Fragile spreader — the widest debuff on the board; do the bat-swap so both players' teams pick up the damage buff
- Tideon (Droppit) · midThree-lane Slow + Fragile mist — the sustained debuff that covers the lanes between Zaplet's marks
- Ecstamira (Funglet) · midSpore field — more Fragile on enemies, plus an ATK and speed buff for allies standing in it
- Sealord (Sealing) · back, in Waveflutter's waveWater DPS that adds Weak on hit — a second debuff type layered on top of the Fragile stack
- Clawzor (Cribbler) · front, hard leftThe carry — its two-lane claw hit does the actual killing once everything is Fragile + Weak + Slow, and it adds Shredded itself
- Cheerspring (Cheerling) · mid, dead centreCore support — AoE heal, ATK/DEF buff, periodic invincibility. Mandatory on both sides
- Waveflutter (Dewgrub) · back, in its wave bubblesTeam CC — Sleep/Slow the whole front so the debuff casters are never pressured. Get it to Tier 3 first
- This is a labeled synthesis, not a sourced 'meta team' — Clash of Critters has no single best Horde comp and the debuff names here (Fragile, Weak, Shredded, Slow) are taken directly from these units' roles as already written on loadoutgg's own Horde meta core team and their individual Tatari pages. The idea is only to push that same 'wide Fragile spreaders so your damage lands harder' line the Modes guide describes to its extreme.
- It differs from the two existing Horde builds on purpose: the standard meta core is a balanced spine, and the Butterfly + Toad build is an Ignitoad lava formation. This one is a debuff-amplification deck where the single carry (Cribbler) is almost interchangeable.
- The whole deck falls apart if the debuff casters die, so Cheerspring and Waveflutter protecting the mid rows is non-negotiable — Waveflutter does almost nothing below Tier 3.
- Run only one of each buff/aura unit (Funglet, Cheerspring) — a second copy of those effects doesn't stack. Extra Fragile spreaders (a second Zaplet) do help.
Flex / subs: A second Sonarbat (Zaplet) in the centre for even more Fragile coverage · Solaflora (Buddi) as a second healer / screen-wide stun against the wall · Ignitoad (Poakie) in the flex front slot to add a burning zone under the debuff stack · Pandarrior (Pandaroo) as the carry instead of Cribbler on the longest waves — its damage ramps the longer it's planted
BEarly campaign — new-player coreCampaign / story stages Stoodbeak (Waddledo)Rockwu (Punchimp)Cheerspring (Cheerling)Zapantler (Voltfawn)
 Hellhound (Pyropup)
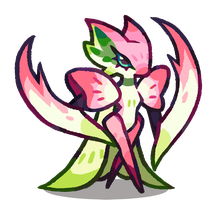 Serrabloom (Manteeny)
The handful of lines that carry a new account through the story chapters while you figure out the rest.
▼ Zobos advance down the lanes
Hellhound (Pyropup)Fire tank + Weak debuffStoodbeak (Waddledo)Water tank — leaves an ice sculpture on deathSerrabloom (Manteeny)Grass tank + AoE▲ Your base
Open this comp in the Team Builder →
Full pick list & why
- Stoodbeak (Waddledo) · frontWater tank — on death it leaves an ice sculpture that buys the team a few seconds. A Tier-3 carries most of the campaign.
- Rockwu (Punchimp) · midMain DPS — three-lane damage from one unit
- Cheerspring (Cheerling) · mid, centreHeal + ATK/DEF buff
- Zapantler (Voltfawn) · backPiercing Lightning DPS + Paralyse — covers Water lanes
- Hellhound (Pyropup) · frontFire tank with a Weak debuff — a second front-liner and Fire coverage
- Serrabloom (Manteeny) · frontGrass tank + AoE — with one healer it can solo a Rock lane
- Fill the open lanes with whatever covers the stage's elements — a common healer, Frugling for Grass, Frostnip for single-target Water.
- Later story stages mix three elements in a single stage, so you can't lean on one element — keep a tank and a DPS in at least Fire, Water, Grass and Lightning.
- Common OP-common Tatari (Capybara and similar) heal while they attack and can plug gaps until your rarer lines are built.
- Evolution priority for a new account: Waveflutter (Dewgrub) to T3, Cheerspring, Tideon (Droppit), Rockwu (Punchimp), and one tank — see the Progression Guide.
- Don't over-invest in Penguin (Waddledo): once its Tier 3 is settling your campaign and Dojo stages, move resources to Cribbler and your Goldrush core.
- The Rockwu (Punchimp) Horde-specific nerf reported on r/ClashofCritters doesn't affect campaign — this comp's Punchimp pick is unaffected outside Horde Invasion.
Flex / subs: Frugling (grass frog) for Grass AoE · Frostnip (Ice Cat) for single-target Water damage · Any common healer you have while Cheerspring is still low
loadoutgg is not affiliated with, endorsed by, or sponsored by FARLIGHT or Lilith Games. Clash of Critters and all character names, art, and other assets referenced here are trademarks and copyrighted material of their respective owners, used for informational/fan-reference purposes. Tatari, Zobo and game-system data on these pages, and some sprite/skill/UI images, are adapted from the Clash of Critters Wiki at clashofcritters.wiki.gg (text rewritten, images resized), used under the Creative Commons Attribution-ShareAlike 4.0 licence (https://creativecommons.org/licenses/by-sa/4.0/); those adaptations are likewise available under CC BY-SA 4.0. Full copyright & licensing detail — including the third-party material used under an open licence — is at loadoutgg.com/legal.