
Summoners Greed/Best Teams
Summoners Greed Best Teams
Summoners Greed has no fixed team — you build one strong core (a booster, a slow, Anubis, your best attacker) and swap a tower or two for each map's element and immunity needs. Start with the Core defense; the others are that core adjusted for bosses, farming and endgame.
SElemental bosses & mapsIce Queen · Volcano Goddess · elemental modes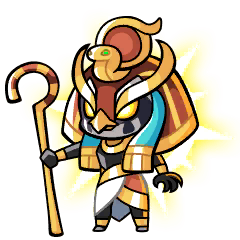 Ra → (Icarus early)
 Amaterasu
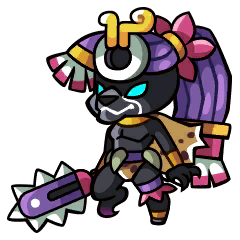 Tezcatlipoca
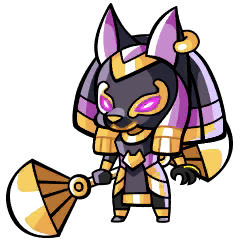 Anubis
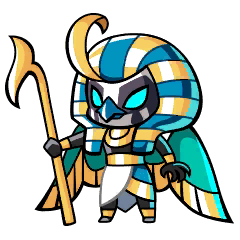 Speed + attack booster
The elemental maps gate progression. Each wants the counter-element damage plus a specific immunity. After the recent update a single Dragon (any Draco Knight) can clear all of the elemental normal modes, so this is really about the harder difficulties.
Full pick list & why
- Ra → (Icarus early) · ImmunityFreeze immunity — mandatory for the Volcano Goddess / ice maps. Icarus is the budget stand-in until you have RaRecommended build:Eye of Ra
Ra's mythical charm — adds a map-wide Fire-damage aura. Also grants Attack Speed, Coin Drop and Elemental Damage.
Full item page → - Amaterasu / Lontari · DamageFire damage for the ice-heavy maps — Amaterasu's global slash is the strongest; Lontari is the strong budget optionRecommended build:Master's Mysterious Scepter
Boosts Skill Cooldown reduction. Also grants Stun duration, Critical Rate and Critical Damage.
Full item page → - Tezcatlipoca / Susanoo · DamageLightning damage for the Ice Queen (fire boss) — long range, wide impact. Susanoo also re-summons your rocksRecommended build:Warrior God's Headpiece
Tezcatlipoca's mythical charm — greatly raises Tezcatlipoca's Attack. Also grants Attack Speed, Critical Rate and Critical Damage.
Full item page → - Anubis · UtilityDamage mark — makes any of the above hit 5× harderRecommended build:Master's Mysterious Scepter
Boosts Skill Cooldown reduction. Also grants Stun duration, Critical Rate and Critical Damage.
Full item page → - Speed + attack booster · BoosterHorus / Speedy + Hellhound / Mighty — carry over from the coreRecommended build:Wings of Horus
Horus's mythical charm — adds a map-wide attack-speed buff. Also grants Critical Rate and Critical Damage.
Full item page →
- Ice Queen is a fire boss → bring lightning or ice damage + nothing that freezes on your side.
- Volcano Goddess is on ice maps → bring fire damage + Ra (or Icarus) for freeze immunity, or your team gets locked.
- King in Yellow turns every tower's attack into Cosmic — that's how you run your strongest non-Cosmic units in the Cosmic Tower.
- For the Kami Pantheon maps specifically, add Athena (stun immunity) and the matching elemental Mythical.
Flex / subs: Jiraiya on any ice map — top slow plus real damage · Genbu as a pure-attack ice option · Loand for the global stun on a chaotic wave
SEndgame teamKami Pantheon · Master's Challenge · Spectre Club Athena
 Anubis + Deathbite
 Poseidon
 Horus
Horus Shisa
Shisa
The hardest recurring content. These maps punish specific things — stun, freeze, tanky waves — so the loadout is your core plus the exact counters each one demands.
Full pick list & why
- Athena · ImmunityStun immunity — required for Kami Pantheon, Meat of the Matter and the Spectre Club. Usable at level 1Recommended build:Master's Mysterious Scepter
Boosts Skill Cooldown reduction. Also grants Stun duration, Critical Rate and Critical Damage.
Full item page → - Anubis + Deathbite · DamageThe insta-kill pair — Anubis marks, Deathbite's beam deletes. Clears the final-difficulty waves nothing else canRecommended build:Master's Mysterious Scepter
Boosts Skill Cooldown reduction. Also grants Stun duration, Critical Rate and Critical Damage.
Full item page → - Poseidon / Swoleseidon · DamageHighest raw damage (with his Monster Card) — the Master's Challenge damage checkRecommended build:Gourmet Fish Food
Poseidon's mythical charm — turns Poseidon's skill into a screen-clearing fish tornado. Also grants Attack, Critical Rate and Critical Damage.
Full item page → - Horus · BoosterMap-wide speed — with his charm, a global boost that makes the whole team viableRecommended build:Wings of Horus
Horus's mythical charm — adds a map-wide attack-speed buff. Also grants Critical Rate and Critical Damage.
Full item page → - Shisa / Jiraiya · ControlThe long slow to survive the dense endgame wavesRecommended build:Master's Mysterious Scepter
Boosts Skill Cooldown reduction. Also grants Stun duration, Critical Rate and Critical Damage.
Full item page →
- Bring Ra to any endgame map that freezes; bring Athena to any that stuns — check the map before you start.
- Osiris still earns its slot on endgame maps you'll re-run for gold.
- Several of these placements assume Monster Cards (EMC/ZMC) are in the game — Poseidon and Horus in particular lean on theirs.
- King in Yellow for the Cosmic Tower's higher floors — everything else you've built becomes a Cosmic attacker while he's out.
Flex / subs: Leviathan for the Island endgame maps — he alone clears them · Loand for a global stun on an overwhelming wave · Devon as a second insta-kill body alongside Deathbite
SCosmic Tower — Devon one-shotThe Cosmic Tower (waves 33 / 66 / 99) DevonAnubis
 The King in Yellow
 AthenaHorus
The Cosmic Tower's Lord of the Tower gates progress at waves 33, 66 and 99 with huge HP pools that out-scale flat damage. Devon's percent-HP strip doesn't care about that scaling — pair it with Anubis's mark and it one-shots almost anything.
Full pick list & why
- Devon / Devonette · DamagePercent-of-current-HP damage that ignores defence — the actual answer to the Tower's scaling HP. No primary attack of its own, so it needs the mark below to finish a killRecommended build:Master's Mysterious Scepter
Boosts Skill Cooldown reduction. Also grants Stun duration, Critical Rate and Critical Damage.
Full item page → - Anubis · Utility5x damage mark — the combo piece. A marked target lets even a low-level Devon strip most of a boss's health in one hitRecommended build:Master's Mysterious Scepter
Boosts Skill Cooldown reduction. Also grants Stun duration, Critical Rate and Critical Damage.
Full item page → - The King in Yellow · UtilityConverts every tower's attack to Cosmic — the wave-66 Lord specifically wants a Cosmic-affinity attacker, and this turns your whole roster into one instead of needing to own a dedicated Cosmic MythicalRecommended build:Tarnished Yellow Crown
The King in Yellow's mythical charm — changes The King in Yellow's skill hits to Cosmic damage. Also grants Elemental Damage and Critical Damage.
Full item page → - Athena · ImmunityStun immunity for the denser late waves leading up to each Lord fightRecommended build:Master's Mysterious Scepter
Boosts Skill Cooldown reduction. Also grants Stun duration, Critical Rate and Critical Damage.
Full item page → - Horus · BoosterMap-wide speed so Anubis's mark and Devon's strip both cycle as often as possibleRecommended build:Wings of Horus
Horus's mythical charm — adds a map-wide attack-speed buff. Also grants Critical Rate and Critical Damage.
Full item page →
- Devon + Anubis is the core combo: Anubis marks, Devon's Death Ball strips a percentage of the marked target's current HP ignoring defence — a level 1 Devon can meaningfully dent a boss the moment it's marked.
- Documented by the YouTuber Grinnn ('How Devon Dominates The Cosmic Tower and the New Meta', Summoner's Greed) — the combo predates the 2026 roster additions but still holds with Medjed/Chillplume-era towers since it doesn't depend on any specific attacker's raw stats.
- Wave 66's Lord of the Tower specifically calls for Cosmic-affinity damage per the game's own Cosmic Tower mechanics (confirmed on the Summoner's Greed Fandom wiki as a factual cross-check) — The King in Yellow's conversion is the practical way to meet that without owning a native Cosmic Mythical.
- The Cosmic Tower is 99 waves total but only an 'Endless' mode in name — most players are really aiming to clear the wave 33/66/99 Lord checkpoints.
Flex / subs: Deathbite as a second insta-kill body if you don't have Devon starred up yet · Ra for freeze immunity if that particular season's Cosmic Tower rotation includes a freezing affix · Nyarlathotep or another native Cosmic Mythical in the King in Yellow's slot if you'd rather run him as your attacker instead
SPvP season ladder teamPvP Map (seasonal reset ladder)AnubisHorusSluggy
PvP resets every monster to level 1 on a new rotating map each season, so raw level doesn't matter — only your stars (from repeat summons), charms and the group of 10 you're laddering against. Build around the pieces that stay strong at level 1.
Full pick list & why
- Anubis · UtilityStill applies its 5x mark at level 1 with no leveling needed — one of the very few towers whose power doesn't get wiped by the PvP resetRecommended build:Master's Mysterious Scepter
Boosts Skill Cooldown reduction. Also grants Stun duration, Critical Rate and Critical Damage.
Full item page → - Horus / Speedy · BoosterSpeed booster — with a starred Horus charm, the map-wide buff still matters even when every tower's base level is reset to 1Recommended build:Wings of Horus
Horus's mythical charm — adds a map-wide attack-speed buff. Also grants Critical Rate and Critical Damage.
Full item page → - Sluggy / Shisa · ControlSlow to keep the reset-level wave on screen long enough for your reduced-power team to actually kill itRecommended build:Master's Mysterious Scepter
Boosts Skill Cooldown reduction. Also grants Stun duration, Critical Rate and Critical Damage.
Full item page → - Your highest-star attacker · DamageWhichever tower you've summoned the most copies of — stars carry over through the reset, so a heavily-starred cheap Legendary can out-damage an unstarred Mythical here
- Best signature charm holder · DamageSlot your strongest earned Mythical/Signature Charm on whichever attacker owns it — charms are the other progress that survives the level reset
- PvP is not player-vs-player combat — it's a shared seasonal map where you and 9 other players in the same bracket race clears; per the game's own PvP mechanics (Summoner's Greed Fandom wiki, cross-checked), every monster's level resets to 1 each season, but star count and equipped charms do not.
- This is thin-signal territory for dedicated team-comp coverage — most available material (e.g. the YouTuber Grinnn's 'Best Layouts for Current PvP Season' and 'Best Layouts to Beat All PvP Seasons with Only Level 1 Monsters') is framed as level-1-only layout advice rather than a fixed named comp, so this entry is a documented synthesis of that framing plus the game's own stars/charms-persist mechanic rather than a single confirmed 'meta team'.
- Because base level is wiped, the pieces that matter most are the ones whose value isn't level-dependent: Anubis's mark, a maxed booster charm, and star count on your main attacker.
Flex / subs: Loand for a global stun if the current season's map throws a dense early wave · Osiris if the season rewards gold rather than PvP-specific currency for clears
SSpecial Monster star-up priorityProgression — which Specials to invest in first1. Horus2. Anubis3. Athena4. Ra 5. Osiris
Specials cost Evolution Stones to star up and there's never enough to max them all at once. This is the order the game's own utility roles argue for investing in first, not a battlefield lineup — get these five ahead of any Mythical chase.
Full pick list & why
- 1. Horus · PriorityHighest return per stone — his map-wide speed buff (once his charm is on) multiplies literally every other tower you own, cheap or expensiveRecommended build:Wings of Horus
Horus's mythical charm — adds a map-wide attack-speed buff. Also grants Critical Rate and Critical Damage.
Full item page → - 2. Anubis · PriorityFree at level 1 in terms of usefulness — the 5x mark scales every attacker's damage without needing its own stars to matter earlyRecommended build:Master's Mysterious Scepter
Boosts Skill Cooldown reduction. Also grants Stun duration, Critical Rate and Critical Damage.
Full item page → - 3. Athena · PriorityUsable from level 1 and the hard gate on Kami Pantheon, the Spectre Club and Meat of the Matter — without her those modes are simply not clearable regardless of your damageRecommended build:Master's Mysterious Scepter
Boosts Skill Cooldown reduction. Also grants Stun duration, Critical Rate and Critical Damage.
Full item page → - 4. Ra · PriorityThe freeze-immunity gate for Volcano Goddess and the ice maps — same logic as Athena, a lock rather than a damage upgradeRecommended build:Eye of Ra
Ra's mythical charm — adds a map-wide Fire-damage aura. Also grants Attack Speed, Coin Drop and Elemental Damage.
Full item page → - 5. Osiris · PriorityOnce the four locks above are open, Osiris's 1.5x gold compounds every future star-up you do — the return on investing in him grows the longer you playRecommended build:Master's Mysterious Scepter
Boosts Skill Cooldown reduction. Also grants Stun duration, Critical Rate and Critical Damage.
Full item page →
- This ordering follows the 'return on Evolution Stones spent' framing from the YouTuber Grinnn's 'STOP WASTING TIME! Best Special Monster ROI Analysis (2026 Update)' — Specials that unlock a whole mode (Athena, Ra) or multiply the rest of the roster (Horus, Anubis) are argued to outperform starring up any single Mythical attacker early.
- This is a resource-priority list, not a deployed team — see Core Defense and Endgame for how these same five actually slot into a live map.
- Dedicated tier-list-creator coverage specifically for Special-monster ROI (as opposed to general Mythical tier lists) is thin for this game; treat the exact ranking as a documented synthesis of that one creator's framing plus the game's own mechanics (which modes hard-require which immunity) rather than a broad creator consensus.
Flex / subs: Move Ra above Athena if your account is further along in Volcano Goddess content than Kami Pantheon · Hanzo as a 6th pick once the above five are covered, purely for farm efficiency
SMaster's Challenge dragon gauntletMaster's Challenge (30-wave elemental dragon gauntlet)AthenaAnubisHorusFire counter — AmaterasuCosmic-neutral finisher — Deathbite
Master's Challenge throws an elemental dragon boss at waves 9 (Fire), 18 (Ice) and 27 (Electric), then all three together at wave 30 — so the team isn't one fixed lineup, it's a stun/mark backbone plus a rotating attacker you swap in per dragon.
Full pick list & why
- Athena · ImmunityStun immunity — Master's Challenge is one of the modes that hard-requires it against the regular waves between dragonsRecommended build:Master's Mysterious Scepter
Boosts Skill Cooldown reduction. Also grants Stun duration, Critical Rate and Critical Damage.
Full item page → - Anubis · Utility5x mark — makes whichever counter-element attacker you've swapped in for the current dragon hit far harderRecommended build:Master's Mysterious Scepter
Boosts Skill Cooldown reduction. Also grants Stun duration, Critical Rate and Critical Damage.
Full item page → - Horus · BoosterMap-wide speed so your swapped-in counter attacker still clears its wave quicklyRecommended build:Wings of Horus
Horus's mythical charm — adds a map-wide attack-speed buff. Also grants Critical Rate and Critical Damage.
Full item page → - Fire counter — Amaterasu / Lontari · DamageSwap in for the wave 18 Ice dragon (fire damage beats it) and keep Ra or Icarus up for its freezeRecommended build:Master's Mysterious Scepter
Boosts Skill Cooldown reduction. Also grants Stun duration, Critical Rate and Critical Damage.
Full item page → - Cosmic-neutral finisher — Deathbite / The King in Yellow · DamageFor wave 27's Electric dragon and the wave 30 three-dragon finale, where no single element has a documented clean counter — go element-neutral instead: Deathbite's true-damage beam or a King in Yellow Cosmic conversionRecommended build:Master's Mysterious Scepter
Boosts Skill Cooldown reduction. Also grants Stun duration, Critical Rate and Critical Damage.
Full item page →
- The wave 9/18/27 Fire/Ice/Electric dragon order and the wave 30 triple-dragon finale are the game's own Master's Challenge structure (confirmed on the Summoner's Greed Fandom wiki as a factual cross-check, not a creator opinion).
- The Fire-beats-Ice and general 'answer the boss's element' logic follows the same counter pattern the community already uses for Ice Queen / Volcano Goddess (see the Elemental Bosses comp) — apply it per-dragon here instead of per-map.
- Dedicated wave-by-wave team coverage specifically for the Master's Challenge dragon gauntlet is thin online; the Electric-dragon and triple-dragon-finale picks here are a documented synthesis (element-neutral true damage in place of an unconfirmed direct counter) rather than a sourced 'best answer', flagged so it isn't read as confirmed meta.
- Master's Challenge itself unlocks once you own at least 18 unique monsters — this comp assumes you're past that gate already.
Flex / subs: Tezcatlipoca or Susanoo as a Lightning-damage swap-in if that performs better against the wave 9 Fire dragon than Ice damage for your roster · Ra as a permanent fixture rather than a swap if freeze immunity is otherwise the run-ending issue
AFarming setupGold & Power Stone farmingOsiris Fast clear attacker
 HorusAnubis
 Slow
Slow
Farming is its own loadout. The goal is to clear a repeatable map as fast as possible while multiplying the drop you're after — gold (for leveling) or Power Stones (for stars).
Full pick list & why
- Osiris · Multiplier1.5× gold. The single reason this is a separate loadout — star and level him as high as you canRecommended build:Master's Mysterious Scepter
Boosts Skill Cooldown reduction. Also grants Stun duration, Critical Rate and Critical Damage.
Full item page → - Fast clear attacker · DamageWhatever clears your farm map fastest — Asura, Amaterasu, or a maxed cheap Legendary. Speed of clear = drops per hourRecommended build:Broken Chains of Retribution
Asura's mythical charm — greatly raises Asura's Attack. Also grants Attack Speed and Critical Rate.
Full item page → - Horus / Speedy · BoosterSpeed booster — more clears per hour directly means more dropsRecommended build:Wings of Horus
Horus's mythical charm — adds a map-wide attack-speed buff. Also grants Critical Rate and Critical Damage.
Full item page → - Anubis · Utility5× damage mark so the clear is instantRecommended build:Master's Mysterious Scepter
Boosts Skill Cooldown reduction. Also grants Stun duration, Critical Rate and Critical Damage.
Full item page → - Slow · ControlSluggy / Shisa — keeps a fast wave on the map long enough to be killed for the dropRecommended build:Master's Mysterious Scepter
Boosts Skill Cooldown reduction. Also grants Stun duration, Critical Rate and Critical Damage.
Full item page →
- The Ice Queen Nightmare map is the standard gold farm — pair Osiris with it.
- For Power Stones (star-up material), swap Osiris's gold multiplier thinking for the Power Stone drop-rate charm on your farm attacker.
- Hanzo is a classic dedicated farm unit — infinite-range special, put a gold or power-stone charm on her and leave her on the farm map.
- Don't farm a map you can't clear near-instantly — a slow clear is worse than farming an easier map faster.
Flex / subs: Hanzo as a self-contained farm carry · Deathbite + Anubis if the farm map has a tanky wave · Moby with a Lucky charm specifically on the Pirate Cat / Island farm maps
BCore defenseAll-purpose — main progressionSpeedy → Horus Mighty → HellhoundSluggy → ShisaAnubis
There's no single fixed team in Summoners Greed — you build one strong core and swap one or two towers per map. This is that core: a booster, a slow, a damage mark, and your best attacker, with a flex slot for the map's element.
Full pick list & why
- Speedy → Horus · BoosterSpeed booster — Speedy's 180% early, Horus (with his charm) for a map-wide 500% later. Speed is the single biggest force multiplierRecommended build:Wings of Horus
Horus's mythical charm — adds a map-wide attack-speed buff. Also grants Critical Rate and Critical Damage.
Full item page → - Mighty → Hellhound · BoosterAttack booster — Mighty early, Hellhound once you can afford to max an event unit. Place it so it buffs your main attackerRecommended build:Master's Mysterious Scepter
Boosts Skill Cooldown reduction. Also grants Stun duration, Critical Rate and Critical Damage.
Full item page → - Sluggy → Shisa / Jiraiya · ControlSlow — Sluggy holds the line early; Shisa's one-minute slow or Jiraiya (also a strong attacker) replace it for goodRecommended build:Master's Mysterious Scepter
Boosts Skill Cooldown reduction. Also grants Stun duration, Critical Rate and Critical Damage.
Full item page → - Anubis · UtilityDamage mark — marked enemies take 5× damage. The enabler for every burst and insta-kill combo. No leveling neededRecommended build:Master's Mysterious Scepter
Boosts Skill Cooldown reduction. Also grants Stun duration, Critical Rate and Critical Damage.
Full item page → - Main attacker · DamageYour highest tier-list Mythical for the map's element — Amaterasu (Fire), Tezcatlipoca (Lightning), Jiraiya (Ice), or a strong null-element unit like Asura
- Slot count grows as you progress — early on you're choosing 4–5, later you have room for the full core plus swaps.
- Early game, one cheap Legendary as the main attacker (Ash / Frostbite / Puffy / Kevin) carries fine. Level ONE of them high rather than spreading resources.
- Osiris goes in whenever you're farming (see the Farming setup) — 1.5× gold is worth a slot on any map you'll run many times.
- Deathbite + Anubis is the standard 'delete everything' pair for the hardest maps — Deathbite needs no leveling.
- Put boosters where their aura actually covers your damage dealers — placement matters as much as the picks.
Flex / subs: Ra or Icarus on freeze maps (Volcano Goddess) for freeze immunity · Athena on Kami Pantheon / Spectre Club / Meat of the Matter for stun immunity · Deathbite or Devon as the insta-kill partner for Anubis on final maps · Daji when the map wants love-stun
BEvil Summoner — decoy & stun-lockThe Evil Summoner (challenge map) CheebsHorusAnubis
The Evil Summoner steals 5-9 of your fielded towers after waves 1 and 2, so the whole team is built to look expendable. Cheap decoys eat the thefts, your real damage stays hidden until wave 3, and Cheebs semi-permanently stun-locks the final boulder-throwing golem.
Full pick list & why
- Cheap filler towers (3-4 low-cost picks) · DecoyBait — field your most disposable, already-owned monsters first so it's them the Evil Summoner banishes after waves 1 and 2, not your real damage
- Cheebs · ControlWith Speedy/Horus on him, his special can semi-permanently stun-lock the Mystical Giant - Final Form when it's parked on a boulder in his range, letting the rest of the team stack damage on it freelyRecommended build:Master's Mysterious Scepter
Boosts Skill Cooldown reduction. Also grants Stun duration, Critical Rate and Critical Damage.
Full item page → - Horus / Speedy · BoosterSpeed booster aimed at Cheebs specifically to keep his stun-lock window as close to permanent as possibleRecommended build:Wings of Horus
Horus's mythical charm — adds a map-wide attack-speed buff. Also grants Critical Rate and Critical Damage.
Full item page → - Anubis · UtilityDamage mark — held back with the main attacker below, not fielded until wave 3Recommended build:Master's Mysterious Scepter
Boosts Skill Cooldown reduction. Also grants Stun duration, Critical Rate and Critical Damage.
Full item page → - Your best attacker (held back) · DamageWhatever your actual damage dealer is — keep it OFF the field for waves 1-2 entirely so the Evil Summoner can't steal it, then place it once wave 3's Mystical Giant appears
- The Evil Summoner is the game's first Challenge Map: 3 waves, and after waves 1 and 2 she steals a batch of your currently-fielded towers (5-6 on Normal, 8-9 on Hard) before letting you refill the empty slots from your roster.
- The standard counter, per the Summoner's Greed community and the YouTuber Grinnn's Evil Summoner guides (including 'Evil Summoner Strategy Guide 2026: Best Way to Get Power Stones Fast'), is simple: never let your main attacker or Anubis touch the field until wave 3 — only cheap, replaceable towers should be up before then.
- The Cheebs stun-lock (Speedy/Horus + Cheebs targeting a boulder near the Mystical Giant - Final Form) is a specific tech documented in the same creator's Evil Summoner content and still works because it depends on Cheebs's own kit, not a rotating roster pick.
- This map is farmed repeatedly for Power Stones once you can clear it consistently, since gear/star progress carries over between runs even though the thefts don't.
Flex / subs: Deathbite in the 'held back' attacker slot for a guaranteed finish once it's revealed · Athena if a given season's Evil Summoner rotation adds a stun affix to the golem
loadoutgg is not affiliated with, endorsed by, or sponsored by Pixio Limited or the creators of Summoners Greed. Summoners Greed and all character names, art, and other assets referenced here are trademarks and copyrighted material of their respective owners, used for informational/fan-reference purposes. The stats, skill and ability text, and other compiled game data on these pages are loadoutgg's own work — extracted from the game's own files and official sources and rewritten in our own words. This compilation is not offered for reuse; please link to loadoutgg rather than copying or scraping it. Full copyright & licensing detail — including the third-party material used under an open licence — is at loadoutgg.com/legal.