The Surviving the Game as a Barbarian collab started on 15 September 2026 and ends on 10 November 2026. Its Rafdonia Labyrinth stages are played as Bjorn, the collab's Legendary Warrior, and they reward a slow, tanky build full of Spike. Each collab character has 7 stages. This guide covers Hard Stages 1 to 5, plus what changes on Normal; Stages 6 and 7 follow once we have a clear of them we can check.
How Bjorn works, and why Spike
Bjorn's whole kit runs on bonus Max HP. Gigantization raises all his damage with every point of Max HP gained above his base, up to 30%, and he visibly grows as it climbs. Flesh Burst fires whenever he loses HP by his own hand: it strips half of his own Block and a tenth of the enemy's, then deals damage that grows with each 100% of bonus Max HP.
That is why Spiked Armor is the heart of every build here. Each one raises Max HP by 40% at the start of the fight, which feeds Gigantization and Flesh Burst, and it also adds 5 Spike every 3.5 seconds, so Bjorn deals damage just by being hit. Get Spiked Armor by merging a Steel Spike into Leather Armor, and buy as many as the shop allows. Hard mode needs a lot of it.
Outside these stages Bjorn is a good pick, not a top one. His damage climbs as the HP stacks up, and the best chapter builds try to end a fight in about ten seconds, well before that climb pays off. That is why he sits in A on the tier list, a band under Rose. The labyrinth is the one place where long fights are the norm, and here he is the right hero.

The pets and when to fire them
The same three pets clear all three Hard stages: Ice Reaper, Jellyfish Princess and Red Dragon. The skill is in the timing, not the lineup.
Jellyfish Princess is the one you use most. Every hit you take has a 30% chance to add 4 Spike, and that keeps working while you're stunned, so you still counter the goblin traps that lock you in place. Red Dragon removes 40% of the enemy's Max HP at the start of the fight, which is why it's saved for boss rounds.
Ice Reaper cuts enemy healing by 40% and inflicts 15 Freeze. Only fire it against enemies that heal. On a boss that doesn't, the Freeze slows the boss's attacks, and fewer attacks means fewer Spike counters, so you do less damage by using it.


Hard Stage 1
Wear Staff of Vitality as the gear weapon. It heals half of your Max HP every 8 seconds, and a quarter of any overhealing turns into Block, which a hero who wants to be hit has plenty of use for. Put Jellyfish Princess in the third pet slot and fire her on rounds 1, 5 and 10, the tougher fights before the boss. Keep Red Dragon for round 12.
Build toward Spiked Armor from the first shop. Steel Spikes on their own add Spike too, but much less than the finished armor, so treat them as merge parts rather than keepers. The stage is simple once the Spike is in place. Keep the build plain and let Bjorn's size do the rest.

Hard Stage 2
Stage 2 switches the gear weapon to Spiral Spear. Its skill triggers your Spike 6 times per hit, which is a large payoff once several Spiked Armors are running. Put Ice Reaper in the first pet slot and Jellyfish Princess in the third.
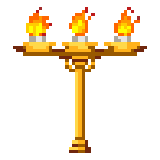
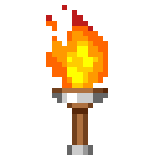
The final boss regenerates, and that decides the build. Merge a Torch and a Spear into a Candlestick by the last round and keep one spare Torch as well. The Candlestick's 50% healing cut and the Torch's 15% stack, and Ice Reaper's 40% on top leaves the boss with almost no healing. If you skip the healing cut, the boss out-heals your damage, and if you buy only healing cut, you run short of damage, so plan for both from the start.
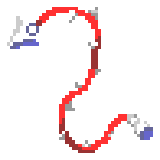
On rounds 4 and 8, the two mid-bosses, fire Red Dragon and Jellyfish Princess but leave Ice Reaper off: neither of them heals, so its Freeze would only slow the hits that trigger your Spike. For extra pieces, a Whip plus a Steel Spike makes a Spiked Whip, which adds 0.5% Spike Crit Rate for every Spike stack you hold, and a Leather Helmet plus a Big Spike makes a Warrior's Helmet. Both come after Spiked Armor, so buy them with the gold left over.

Hard Stage 3
Stage 3 goes back to Staff of Vitality. Use Ice Reaper on rounds 2 and 6: those rounds bring Bloated Corpses that come back to life, and the healing cut shrinks how much HP they return with. Fire Red Dragon and Jellyfish Princess on the harder rounds to be safe.
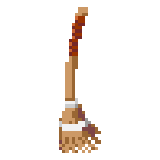
The final boss poisons you. Put a Broom in the backpack for round 12. It strips 5 debuffs every 5.5 seconds, so the poison never stacks up. Keep evolving Spiked Armor through the whole stage, since each one makes Bjorn bigger and stronger through the Max HP it adds.
Hard Stage 4
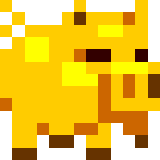
Stage 4 asks for the same Bjorn as the first three: big, healed and covered in Spike. The difference is that Spike parts can be slow to appear. One clear we checked couldn't find the Spikes for Spiked Armor until after the first boss, so it lived on healing items and whatever weapons the shop offered, with three Golden Pigs adding 1 Coin a shop visit while they waited. Once Spiked Armor starts coming together, switch to it fully.
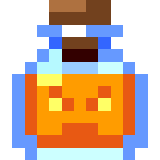
Late in the run, fill single slots with Steel Barbs at 6 Coins rather than 3-Coin Spikes. A Fairy (0.08x Max HP healed on every hit) or Steak keeps him topped up, and Bjorn's own Berserk Potion fits the build as it does everywhere else: 15% more Max HP, and HP drained by his own hand to fire Flesh Burst. Build the weapons around the potions, since each one gives the items socketed next to it 15% Haste.
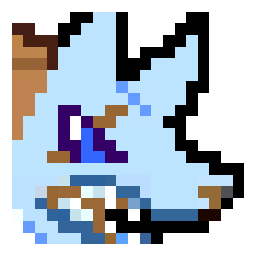
The final boss, Duke Cambormere, regenerates. Bring a Candlestick and one Torch, as on Stage 2: the 50% and 15% healing cuts together stop the regeneration. Save every pet for the boss rounds. The clear we checked ran Ice Reaper, Red Dragon and White Wolf Captain, whose 30% Haste on all weapons for 10 seconds speeds up the opening of each boss fight.
Hard Stage 5
Stage 5 is the most luck-dependent so far. The clear we checked finished the Orc Hero with four Spiked Armors, a Spiked Whip, a backpack's worth of Spikes and Steel Barbs, and Leather Gloves and Whetstones to speed up and strengthen the pieces around them. Bjorn ended the fight holding over two hundred Spike stacks. The pets were Yeti, Red Dragon and Jellyfish Princess.
Yeti earns its place here. Its 10 seconds of Stun immunity at the start covers the opening stuns, and each Stun it resists hits back and stuns the enemy for 1 second. Jellyfish Princess keeps adding Spike while you are being hit, and Red Dragon still belongs on the boss round.
A second player needed about twenty attempts to repeat the build, because the whole plan hangs on the shop offering Spike parts. If you reach the middle rounds with no Spiked Armor and few Spikes, restarting is usually faster than forcing a different build. Bjorn has nothing else that scales this well.


Normal mode and other routes
Normal mode wants the same thing. If the shop gives you no Spike parts, the run stalls even on Normal, so buy Steel Spikes and Leather Armor before anything else. On Stage 2 Normal, enough Torches cancel the boss's regeneration, but only if you still have enough damage.
Stage 1 has an extra annoyance: touching an enemy stuns you for 4 seconds. Stage 2 drops that stun and hands out better gear, and with a healing cut in the pack it can go down on the first try.
Other clears use different pets. One skips Red Dragon and fires its Spike pet a second time instead, with Vamp for sustain. Another pairs Staff of Vitality with a single Berserk Potion and Bjorn's own Lithinum Greatshield. The Berserk Potion fits his kit well: it raises Max HP by 15% at the start, then drains HP every 3.5 seconds, and each drain is HP lost by his own hand, which is what fires Flesh Burst. A Mimic, Red Dragon and Yeti lineup also clears Hard, with Yeti's 10 seconds of Stun immunity covering the stuns.
Mistakes to avoid
Firing Ice Reaper on every boss. It helps only against healing and revives, and anywhere else its Freeze costs you Spike damage.
Buying a burn or crit plan because it works in chapters. Bjorn's damage comes from Max HP and Spike, and none of the clears here use a burn build.
Ending the run with too few Spiked Armors. Hard mode wants as many as you can fit, so keep merging them right up to the final round.
Playing on an old client. An early build had a bug that made one later stage stack far more Burn on each heal than intended, and the current update fixes it, so update the game before you push the later stages.