
Double Up ran from 1 September to 28 September 2026 (end of day, UTC) and has now ended; the stage notes below stay up for reference. It has seven stages, each on Normal and Hard, and you bring two heroes into every run. The key rule: everyone's stats are set to the same values in this mode, so your account power does nothing and the build is the whole fight. That is also why the picks below look nothing like the chapter builds elsewhere on this site. A Warrior with no skill clears Stage 1, and Primal Flame barely appears.
How Double Up works
Because stats are equal, a clear comes down to picking the right two mechanics and finishing one of them. Two heroes let you stack a pair of systems that never meet in a chapter run, such as Rebecca's Block-to-damage with Venom's poison slots, and that pairing is where most of the power comes from. The common way to lose is switching plans halfway: a run that owns three Spiked Armors beats a run that owns one Spiked Armor, one poison bow and half a Thunder Dragon.
Pick your gear weapon and pets for the bosses of that stage, not for general strength. Each stage below names its bosses' tricks, and most of them punish one specific plan: healers, Dodge, buff theft, enemies that resist weapon hits. Mimic is less important here than in chapters, since the shop is small and runs are short, although it still earns its slot on the stages that need Spiked Armor early.
Pet mana refills on every fourth round. Spend all of it on rounds 4, 8 and 12 without worrying, because it comes back. If you lose on round 11 or 12, the revive ad restores all pet mana too, which is often enough to turn the retry into a clear.
Is it worth your time? Yes. The regular rewards include free keys for S and Legendary chests, and the event shards count toward Rare and Elite heroes, so it speeds up your next Elite unlock. If you bought the premium Fund, it guarantees a random Rare hero and a random Legendary hero, with more Rare and Elite shards along its track. The Fund pays out on stage clears, so clear all seven stages on both difficulties as early as you can rather than leaving Hard for the last week.


Stage 1: Warrior and Spike
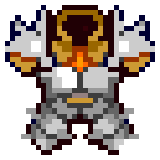
Stage 1 is won with counterattacks. The enemies have too much HP for a Warrior's plain hits, so Spike is how you damage them. Keep the Spear you start with and build toward Spiked Armor: merge a Steel Spike into Leather Armor, and a Big Spike into a Leather Helmet for a Warrior's Helmet. Each Spiked Armor adds 5 Spike every 3.5 seconds, so plan on at least three before the final boss.
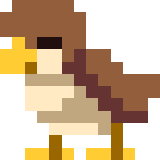
Round 7 is the trap. That enemy steals your buffs, and Spike is one of them. Pull every Spike item out of the backpack for round 7, fight it on raw damage, then put them all back for rounds 8 to 12. Baby Hawk is the best cheap damage piece in this run: one slot, and a 60% chance to gain 3 Focus on each hit.
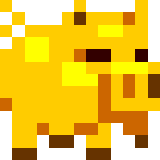
Golden Pigs next to tools on both sides give the tools extra max HP, and each Pig adds a coin every shop visit. By round 10 you need the space and the gold more than the HP, so sell a Pig to fit the third Spiked Armor. Leave out Dodge items and the Shield. Your damage comes from being hit, and these enemies don't attack fast enough to make a Shield worth a slot. A freeze weapon was tried here and didn't do enough damage.


Stage 2: Rebecca on Block and poison
Rebecca's weapons deal extra damage equal to 10% of her current Block, so on this stage Block is your damage stat. Take the gear weapon that both hits and raises Block. Put armor next to the starting Anvil to make Plate Armor, then surround the Plate Armor with shields and helmets, since every socketed Armor adds Block to it. If you're not going for Plate Armor, sell the Anvil at once for the quick coins.
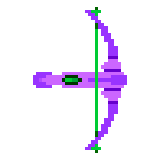
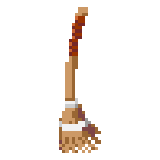
Two tiles on this board are poison spots. Any item covering one gives you poison stacks, so keep them empty. A Broom strips 5 debuffs every 5.5 seconds and clears the poison the boss puts on you. For damage on top of Block, merge a Crossbow with one Poison Powder into a Poison Crossbow, which is cheap, and two Powders with a Training Bow into a Poison Bow. By rounds 9 to 12, four or five poison bugs and two or three Poison Powders shorten the late fights by a lot. A Hammer works as a general weapon if the shop gives you one.
Round 11's miniboss burns you hard whenever your Block runs out, so don't let Block drop to zero there. Mimic is the pet that matters most on this stage: it merges everything at the start of the round, which finishes the Plate Armor sooner. Leave the freeze pet unused. Freeze slows enemy attacks, and slower attacks mean fewer Spike counters.


Stage 3: Rebecca with the spike spear
Stage 3 changes Rebecca to Spike. Its boss has a lot of Dodge, and Dodge does nothing against counterattack damage. Wear Spiral Spear: its skill triggers Spike 6 times per hit, and with Spiked Armor and a Warrior's Helmet in the pack that is a big hit every round. Merge the multi-spike into Leather Armor early to get Spike going.
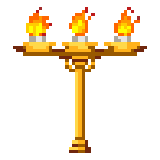
Rounds 4 to 8 bring Blood-Red healers. Merge a Spear and a Torch into a Candlestick for 50% healing reduction, and turn on Ice Reaper for its 40%. Together they leave the healers with almost no healing. After round 8 nothing heals any more, so sell the Candlestick and Torches on round 9 and use the space for more armor.
Rounds 9 and 10 are Dodge enemies. Their Dodge builds up at the start of the round, and a buff-stripping necklace keeps removing it for the whole fight. For rounds 11 and 12, stack Spiked Armor: four is the minimum, and five or six is better. Two Hammers, at 40% Stun each, help while the armor builds. Skip mage equipment on this stage, because it takes too much room for what it adds.

Stage 4: Rebecca and Venom
Stage 4 pairs Rebecca's Block with Venom's poison. Take the gear weapon that raises Block each time it fires. Venom enhances 2 random slots, and items in those slots inflict 50% more Poison. On this board, poison bugs and a Venomous Fairy placed on the poison spots apply more poison too, so those tiles are wanted here, unlike Stage 2. Merge a poison insect with a Fairy for the Venomous Fairy: 5 Poison on each hit.
Pick the Poison Crossbow over the Poison Bow when the shop lets you choose. The Crossbow costs 4 coins and needs a single Poison Powder. Build Spiked Armor alongside the poison, merging the multi-spikes into Leather Armor and the single spikes into leather helmets. The Store VIP Card is easy to overlook, but it speeds up how quickly the Spike pieces arrive.
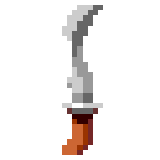
Round 11's enemy resists Spike, poison and Burn by 60%, and the fix is simply more of both, not a third plan. The round 12 boss goes berserk and attacks much faster, and every extra hit runs into your Spike, so a heavy Spike board wins that fight almost by itself. Leave out burn items apart from the dragons, because most of them only apply Burn for a short time. The Dagger's long cooldown isn't worth the slot unless several weapons touch it.



Stage 5: Rose goes through the Block
Stage 5 enemies carry huge Block, and Rose's Impale is the answer: her Spike, Poison and Burn ignore Block completely. Bring Jellyfish Princess as the third pet. Every hit you take has a chance to add 4 Spike, which Rose's Red Roses then trigger every 3.3 seconds. Use Mimic to finish the first Spiked Armor a round earlier.
Rounds 1 to 8 are about buffs. The enemies regenerate, build their own Spike, and one uses Vamp on round 7, and buff-stripping necklaces remove all of it. For rounds 5 to 8, merge three Rocks into a Boulder: all weapon damage goes up 50% and every item slows by 30%, a trade that pays off against these high-Block enemies.
Rounds 9 to 12 need a new plan. Those enemies take extra Crit damage, but they Seal any weapon that hits them without a Crit. Put a Rope Trap between two weapons for more Crit Rate, and move the hunter's bow next to a haste glove. Burn items aren't worth buying here, since they stack too slowly to matter before the fight ends.




Stage 6: Rose with the healing staff
Stage 6 is Rose again, and other plans have a hard time clearing it. Keep the pets from Stage 5 and change the gear weapon to Staff of Vitality. It heals half your max HP every 8 seconds, and a quarter of any overhealing from it or from healing items socketed around it turns into Block. That gives Rose room in the early rounds and keeps her Block up later.
Put healing items on the Staff's circle sockets, fill the rest with Red Roses and Spiked Armor, and place a Leather Glove between two Spiked Armors. Its 15% Haste then speeds up both Spike sources at once. Merge a Golden Hero Statue into the Dragon to make a Golden Dragon. Keep any spare Steel Spike away from the starting Whip, or they merge into a Spiked Whip and you lose the spike you needed for armor.
Save the Amulet for round 7, whose enemy regenerates. From round 9, Volcanic Lizards and the late bosses Burn you whenever you have no Block, and enough stacks can kill you in one hit. Healing items feeding Block through the Staff are what prevent that. Mage spells aren't worth a slot on this stage.



Stage 7 (Normal): Talin on bows
Stage 7 goes to Talin on bows, keeping Mimic and Red Dragon and adding a third pet. Her Crits refund 15% of the weapon's remaining cooldown, so every Crit makes a bow fire sooner. Take the gear weapon that gives Block and deals damage. Its bosses flip the usual order, and that decides the whole plan: the round 8 boss is immune to regular attacks but takes extra damage from Spike, Poison and Burn, while the round 12 boss is immune to all of those and weak to plain weapon hits.
Rounds 1, 2 and 4 bring Entwined Souls that steal buffs, so take every buff item out for them, including the Blood Stone and the hunter's bow. For rounds 4 to 8, the armored slimes barely take weapon damage, and Spike, Poison and Burn do the work. Merge a Blood Stone and Leather Gloves into Blood-Soaked Gloves and put them next to two Spiked Armors, which then fire 25% faster. A Fighter helmet with a Big Spike makes a Warrior's Helmet for extra Spike.
Before round 12, sell every Spiked Armor and fill the space with weapons. Buy several Baby Hawks: each adds Focus and helps a bow's poor Accuracy. Turn the bows so they all touch the Dagger, since each weapon touching it refunds 30% of its cooldown on a hit. Put a Whetstone against as many weapons as it can touch, and keep one Boulder on the side for the final boss's 50% weapon damage.



The shortcut: Spark on every stage
If you'd rather learn one build than seven, Spark with two of her own signature weapons, a Thunder Dragon, and a Flame Mage's Hat or a Frost Mage's Hat clears Easy and Hard with very little else. Thunder Dragon's hits all become Critical Hits while the enemy is Stunned, and Spark adds 15% Stun chance, so the enemy spends most of the fight locked.
The exception is a final boss immune to Stun. Stun is all this plan has, so on those stages go back to the stage builds above. For the second hero, Warrior lets you stack plate helmets on the Thunder Dragon, and a Ranger partner adds Dodge and healing. Rebecca stacking plate helmets on a single Gladius is the other damage default.
For pets, a Hunting Hawk handles Dodge enemies and Ice Reaper handles healers. Mimic isn't needed for this build, so its slot can go to one of those counters.



Mistakes that cost a clear
Using the freeze pet on a Spike stage. Freeze slows the enemy's attacks, and every attack it doesn't make is a counter you don't deal. It belongs on healer rounds only.
Leaving Spike items in during a buff-steal round. Stage 1 round 7 and Stage 7 rounds 1, 2 and 4 hand your own stacks to the enemy. Pull the items for that round and put them back after.
Keeping a plan the boss is immune to. Stage 7's final boss ignores Spike and Poison, and Stun-immune finals ignore the Spark plan. Check the last round before you build, then sell early instead of on the final round.