
Lumi Master/Best Teams
Lumi Master Best Teams
Built around MEGA TOMATOBaton RelayPvP · Arena ladder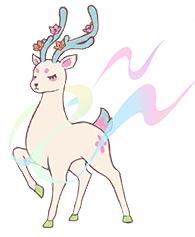 1Rainbowdeer
 Call for Help
 2Meteofly - Variant
 Baton Pass
 3MEGA TOMATO
 Focus Blast

Three Lumi pass one growing pile of stages down the line. Rainbowdeer cuts the enemy's ATK by 2 on entry and hands over with Call for Help, so Meteofly - Variant arrives with an ATK stage. Meteofly falls asleep as it lands, and its signature wakes it with 2 more ATK and DEF. Baton Pass then carries every stage to MEGA TOMATO, which enters in Stealth and turns them into a cheap Focus Blast at 350% crit damage.
Lead Rainbowdeer and bank Energy until you can cast Call for Help with 10 in hand, so Meteofly - Variant can follow up the moment it lands. Star Wish hits for 35 and puts it to sleep; cast Starchaser while it is still Asleep to wake with +2 ATK and +2 DEF on top of the stage Call for Help gave it. Baton Pass into MEGA TOMATO, put Shield on it as it enters, then fire Focus Blast, which costs 1 less Energy for every positive ATK stage it is carrying.
- 1Lead, cuts ATK and hands overCall for HelpHits the current enemy and switches out; the Lumi coming in gains +1 ATK stage.
- 2Stage builder, wakes with +2/+2Baton PassHits the current enemy and switches out, handing this Lumi's ATK and DEF stages to the Lumi coming in.
- 3Finisher, cashes the stages inFocus BlastHits the current enemy with a ki blast. Costs 1 less Energy per positive ATK stage; afterwards this Lumi's ATK drops by 1 stage.


 Core
Anything that wipes stages. Cleansing Wind resets the whole pile, Tornado strips it, and a roar that drags MEGA TOMATO out sheds everything it was handed. Puncheroo gets a free Charged Punch on each of your three entries. Flying, Light and Brawler hit MEGA TOMATO for double, and Electric, Ice and Dark hit Meteofly - Variant for double while it sleeps.
Substitutes: any other Lumi with Baton Pass can take Meteofly's middle slot, as long as it builds stages of its own before it passes them.
Built around PuncherooPuncheroo StormPvP · Arena ladder 1Puncheroo
 Warm Up
 2Charigon
 Dragon Rage
 3Regaffin
 Storm Strike
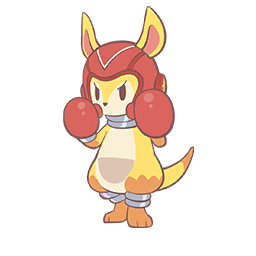
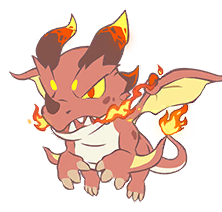
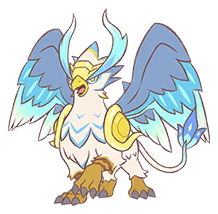
A free-to-play team with an answer for each kind of opponent, chosen by who leads. Puncheroo punishes swap and baton teams, since Charged Punch hits every Lumi they bring in for free. Charigon is the neutral lead that strips 2 DEF on entry and follows with Dragon Rage. Regaffin sets its own Storm with Storm Strike, which makes Swift Storm 2 Energy cheaper and adds 50% crit rate.
Pick the lead from the enemy's line-up. Against roar, trap, hand-off or Baton Pass teams lead Puncheroo, cast Warm Up for 2 ATK stages so the enemy has to spend a Shield, and let every swap they make feed Charged Punch. Against anything else lead Charigon, take the 2 DEF stages on entry and cast Dragon Rage on a target that can't leave. Bring Regaffin in once Storm Strike can go up, then end the fight with Swift Storm while Storm lasts.
- 1
- 2Neutral lead, cuts DEF on entryDragon RageHits the current enemy and lowers its DEF by 1 stage. Every DEF stage it has lost gives this hit 20% Pierce.
- 3Finisher in StormStorm StrikeSets the weather to Storm, hits every enemy on the field and resets your switch cooldown.
 Core


Weather. A Rain, Snow or Harsh Sunlight setter takes Storm away and Regaffin loses both its discount and its crit rate. Cleansing Wind undoes Warm Up and Charigon's cuts. Ice hits Charigon and Regaffin for double, and Fairy and Royal hit Charigon and Puncheroo for double.
Built around Lycanite - VariantLycanite SustainPvP · Arena ladder 1Sandlord
 Earth Retreat
 2Lycanite - Variant
 Swift Strike
 3Psykat
 Hypnotize
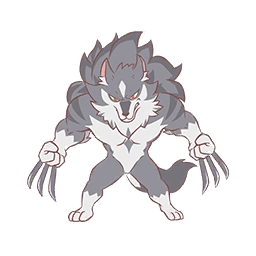
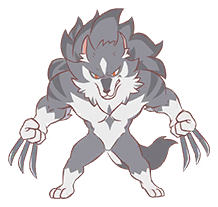
Sandlord builds DEF and hands it to Lycanite - Variant, which then outlasts the fight. Gloves Off adds 2 DEF stages, and Earth Retreat switches out with one more for the receiver, while Parting Gift passes the rest, so Lycanite arrives 3 DEF up. Two Swift Strikes give it the Swift for its signature's 50% lifesteal, and below half HP its basic attacks heal for the full damage they deal. Psykat holds the back with a once-per-battle 30% heal and sleep.
Lead Sandlord and cast Gloves Off once; with ATK and DEF level the 2 stages go to DEF. Switch with Earth Retreat so Lycanite - Variant comes in 3 DEF stages up. Cast Swift Strike twice, then Deadly Claw with 2 Swift for the lifesteal, or wait for 4 Swift and it strikes twice. When any of your Lumi drops below half HP, Psykat's Dreamy heals it and puts the enemy to sleep once per battle.
- 1Lead, builds DEF and hands it overEarth RetreatHits the current enemy and switches out; the Lumi coming in gains +1 DEF stage.
- 2Main damage, heals as it hitsSwift StrikeHits the current enemy and gives this Lumi 1 Swift.
- 3

 Core
A forced swap on Sandlord, since Parting Gift passes nothing when an enemy skill drags it out. Cleansing Wind resets the hand-off, and Charigon takes 2 DEF stages back as it enters. Fire, Brawler and Royal hit Lycanite - Variant for double.
Substitutes: Clionia for Psykat when Fire teams are common. Lycanite - Variant takes double from Fire, and Clionia's Water skills hit Fire Lumi such as Flamblades for double.
Built around RainkatRain CurtainPvP · Weekly tournament 1Rainkat
 Pray for Rain
 2Shriegon
 Tidal Force
 3Clionia
 Wave Rush

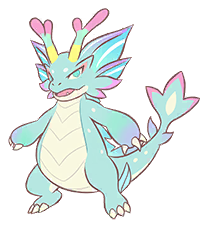
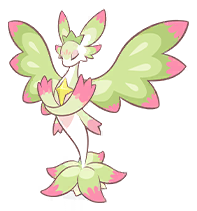
Three Water Lumi under Rain. Rainkat's Pray for Rain sets the weather and gives your whole side Wet, and with three Water Lumi in the squad Rain Curtain cuts the damage every Wet ally takes by 30%. Shriegon's skills cost 2 less in Rain, and Tidal Force gains 20% damage for every point saved. Clionia picks up a Wet stack every time an ally casts, and Wave Rush turns each stack into a Leech on the enemy and a heal for your squad.
Lead Rainkat and cast Pray for Rain first, so every Lumi on your side carries Wet and the damage cut is on. Bring Shriegon in while Rain holds: Tidal Force costs 5 there and lands 40% harder. Clionia has been gathering Wet from every skill your side cast, so its Wave Rush puts that many Leech on the enemy and heals the squad 2% per stack.
- 1Lead, sets Rain and WetPray for RainSets the weather to Rain, hits every enemy on the field and gives every Lumi on your side of the field 1 Wet.
- 2Main damage in RainTidal ForceHits the current enemy with a wave; +20% damage for every point its Energy cost has been reduced.
- 3Sustain, Leech and healsWave RushHits the current enemy; for each Wet stack on this Lumi, applies 1 Leech to the target and heals your squad for 2% of max HP.
 Core

Another weather setter. Storm, Snow or Harsh Sunlight replaces Rain, and Shriegon loses its discount until Rainkat casts again. Grass and Electric hit Rainkat for double, and Ice hits both Shriegon and Clionia for double.
Bans: Floragon takes a quarter damage from Water, so ban it in the tournament when you can.
Built around Big Bad Goma + Little Red PeachGoma Pounce PairPvP · Arena ladder 1Big Bad Goma
 Poison
 2Little Red PeachSweet Peach
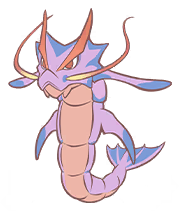 3Loongster
 Rough Spot
 Core LumiBig Bad GomaABig Bad Goma is A because Goma Pounce, fed by a full Little Red Peach, lands at triple damage for 5 Energy on 100 ATK. Without her it is a plain 80-power hit, and a 3-Energy roar pulls it off before it fires.
 Core LumiLittle Red PeachALittle Red Peach is A as half of the Goma Pounce pair: her full HP bar triples Big Bad Goma's signature, and every skill that hits her heals the squad 5%. Alone she is a 30-power hit with a self-heal.
This team is built around one hit. Goma Pounce is 80 power for 5 Energy, but with Little Red Peach alive on the team it drains her HP bar first and gains 20% damage for every 10% it takes, so a full bar adds 200%. She keeps that bar full herself: Sweet Peach heals her 15% for 3 Energy, and each skill that lands on her restores 5% of max HP to the whole squad. Loongster closes with Rough Spot, a Water hit and a Fire hit in one cast.
Lead with Big Bad Goma and chip with Poison while you bank Energy. Cast Goma Pounce only while Little Red Peach's bar is full, since every 10% missing from it is 20% damage lost. Then bring Loongster in on something Water or Fire hits for double: a super-effective Rough Spot gives it 2 Wet and an ATK stage.
- 1
- 2Fuel for the pounce, heals the squadSweet PeachHits the current enemy and heals this Lumi for 15% of its max HP.
- 3Closer, hits as two typesRough SpotHits the current enemy twice — once as Water, once as Fire.
Dragon Roar. A 3-Energy roar pulls Big Bad Goma off before it reaches 5 Energy, and a roar team can drag Little Red Peach in and wear her bar down, which shrinks the pounce. Sanctify takes 2 ATK stages off for 3 Energy. Flying, Light and Brawler hit Big Bad Goma for double, and Ground does the same to both partners.
Protect Little Red Peach first. Without her the pounce is a plain 80-power hit.
Super Peach for Loongster: the all-collab version. Magic Beam gains 40% damage for each defeated Purr-fect Date Lumi on the team, so it closes harder the longer the fight runs. It needs the collab pass.
Built around MEGA TOMATOTomato Stealth CloserPvP · Arena ladder1Rainbowdeer Radiant Blast2Clionia
 Water Retreat3MEGA TOMATOPoison
Two sturdy Lumi clear the way for one entrance. MEGA TOMATO arrives in Stealth, which raises its crit rate until an enemy skill hits it, and TOMATO Laser pushes its crit damage to 350% while Stealth holds. Rainbowdeer opens by cutting the enemy's ATK 2 stages with Fortune and trades behind 100 DEF and 100 HP. Clionia banks a Wet through Stream every time an ally casts, then leaves on Water Retreat so MEGA TOMATO comes in carrying 1 Wet.
Lead Rainbowdeer. Cast Purifying Judgment when it is carrying statuses or stat drops, since the hit clears them, and Radiant Blast when it is hurt, for a 20% heal. Swap to Clionia once the enemy's damage is cut: Wave Rush puts 1 Leech on the target for each Wet she holds and heals the squad 2% per Wet. Water Retreat then sends MEGA TOMATO in. Open with TOMATO Laser, and put 2 Poison on anything that survives.
- 1Lead, tanks and cleans itself upRadiant BlastHits the current enemy and heals this Lumi for 20% of its max HP.
- 2Pivot, heals and hands overWater RetreatHits the current enemy and switches out; the Lumi coming in gains 1 Wet.
- 3
Ice and Light. Ice hits Clionia for double and Light does the same to MEGA TOMATO, so Ice squads and an enemy Rainbowdeer lead are the hard matchups. Flying hits both of them for double as well. Any enemy skill that lands on MEGA TOMATO ends its Stealth, so a faster attacker closes the window before the Laser fires.
Each knockout gives MEGA TOMATO Energy, so point it at the weakest enemy first. It only comes from the TOMATO pass.
Built around CharigonFree-to-Play Dragon RagePvP · Arena ladder1RainbowdeerCall for Help2CharigonDragon Rage3PsykatHypnotize
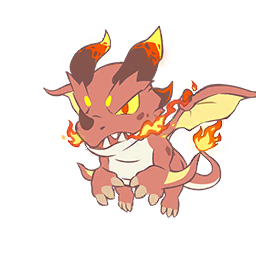
None of these three is a limited or pass Lumi, and there is no roar to learn. Rainbowdeer enters and Fortune cuts the enemy's ATK 2 stages. Call for Help then sends Charigon in with an ATK stage, and Draconic Terror strips 2 DEF stages from whatever it faces as it lands. Dragon Rage costs 5, takes a third stage and gains 20% Pierce for every stage the target has lost. Psykat sits on the bench: the first time one of your Lumi drops below half, Dreamy heals it 30% and puts the enemy to sleep.
Lead Rainbowdeer and bank Energy behind Fortune's ATK cut. Cast Call for Help with 5 Energy still in hand, so Charigon can fire Dragon Rage the moment it arrives, on a target already 2 DEF stages down. Put Inspire on that cast. If the enemy swaps, the new Lumi comes in at full DEF, so pull Charigon out and bring it back for another Draconic Terror.
- 1Lead, cuts ATK and hands offCall for HelpHits the current enemy and switches out; the Lumi coming in gains +1 ATK stage.
- 2Carry, cuts DEF on entry and piercesDragon RageHits the current enemy and lowers its DEF by 1 stage. Every DEF stage it has lost gives this hit 20% Pierce.
- 3
Cleansing Wind, which resets every stage on the field, and a swap, which sheds the DEF cuts. Ground hits both Rainbowdeer and Charigon for double, and Ice, Dragon, Fairy and Royal hit Charigon too. Grass and Dark force Psykat out if it has to come in.
Dreamy fires once a battle. If Psykat does come in, Hypnotize pins a tanky enemy in front of Charigon, since an Asleep Lumi can't be switched out by hand.
Hexdeer for Rainbowdeer: the same Fortune and Call for Help on a smaller body, if you haven't evolved it yet.
Led by RainbowdeerRoar BreakerPvP · Arena ladder1Rainbowdeer Healing Light
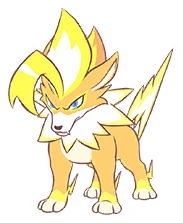 2Zaphound
 Lightning Raid
 3Bluesaur GomaDragon Rage
A team for beating roar-and-trap squads. They win by dragging your Lumi across Poison Swamp and Earth Spike, so this one ends the fight before the traps add up. Zaphound paralyses the current enemy every time it enters and Lightning Raid gains 50% crit rate per stack, on 110 ATK. Bluesaur Goma brings your own 3-Energy roar, which pulls in the enemy's lowest-HP Lumi with a DEF stage already gone. Rainbowdeer leads, cuts ATK and cures Poison across the squad.
Lead Rainbowdeer for Fortune's 2-stage ATK cut, and cast Healing Light whenever the traps have put Poison on your squad: it heals everyone 15% and cures all of it. When their roar Lumi is on the field, swap Zaphound in so Thunder Strike paralyses it, then crit it out with Lightning Raid. Bluesaur Goma's roar finishes whatever is left on low HP.
- 1Lead, cuts ATK and cures PoisonHealing LightHeals every Lumi in your squad for 15% of max HP and cures all their Poison.
- 2Swap-in, paralyses on entry and critsLightning RaidRams the current enemy; +50% crit rate for every Paralysis stack the target carries.
- 3Roar, drags in the weakestDragon RageHits the current enemy and lowers its DEF by 1 stage. Every DEF stage it has lost gives this hit 20% Pierce.

Ground hits Rainbowdeer and Zaphound for double, and Rochelon, the Earth Spike Lumi on most trap teams, is Ground, so don't leave Zaphound in front of it. Ice, Dragon, Fairy and Royal hit Bluesaur Goma. Healing Light leaves Burn and Paralysis alone, so the Static Field and Fire Vortex version of the trap team gets through it.
An enemy roar can drag Zaphound back in, and every forced entry is another Thunder Strike. Bluesaur Goma is sold in the Peach Cat collab shop until late October.
Led by ZaphoundParalysis AmbushPvP · Arena ladder1ZaphoundLightning Raid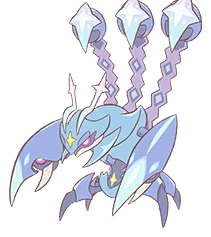 2AstrastingPoison3ClioniaWater Retreat
Zaphound paralyses whatever it meets, and Astrasting passes that Paralysis around the enemy bench. Thunder Strike puts 1 Paralysis on the current enemy each time Zaphound enters, and Lightning Raid gains 50% crit rate for every stack on its target. Astrasting's Flash Stinger hits for 4 Energy and slips out into Ambush; when it comes back in it hits again and spreads 1 stack of each debuff on its target to the enemy's other Lumi. Clionia keeps the rotation healthy and hands out Wet on her way out.
Lead Zaphound so Thunder Strike lands the first Paralysis. Bring Astrasting in, put 2 Poison on the target, then cast Flash Stinger and let it leave. Its return hit copies Paralysis and Poison across their bench. Send Zaphound back in for another stack and cast Lightning Raid: two stacks add 100% crit rate. Clionia comes in when someone needs healing, and Water Retreat gives the next Lumi 1 Wet.
- 1Lead, paralyses on entry and critsLightning RaidRams the current enemy; +50% crit rate for every Paralysis stack the target carries.
- 2
- 3Pivot, heals and hands over WetWater RetreatHits the current enemy and switches out; the Lumi coming in gains 1 Wet.
Ice squads. Ice hits Clionia for double, and she is the only healing here. Flying hits both Astrasting and Clionia for double, Ground does the same to Zaphound, and Astrasting has five double weaknesses in all. Anything that clears statuses undoes the work: Rainbowdeer's Purifying Judgment cleans itself, and Healing Light cures Poison across a squad.
Each Paralysis stack also slows the target's attacks by 10%, so the spread makes the whole enemy squad hit less often.
Built around SandlordHand-Off SweepPvP · Arena ladder1Sandlord Gloves Off
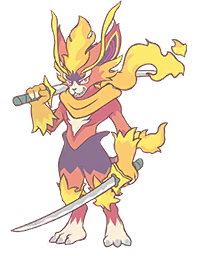 2Flamblades
 Raid
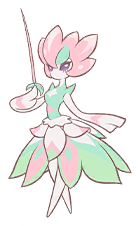 3Bloom
 Blooming Flowers

Sandlord builds stages and gives them away. Gloves Off costs 3 Energy and adds 2 stages to whichever of its ATK or DEF is lower, and Parting Gift hands every stage to the Lumi that replaces it when you switch it out yourself, so no skill slot goes on Baton Pass. Four casts make 4 ATK and 4 DEF stages for 12 Energy. Flamblades or Bloom, both on 110 ATK, then starts the fight already boosted.
Lead Sandlord and cast Gloves Off as often as its HP allows; two casts are the minimum. Switch it out by hand into the receiver the matchup wants. Flamblades opens with Fireblade Assault for Burn and Swift, then Raid, which always crits while it attacks faster than its target. Keep Bloom for Water and Ground enemies, where Grass hits for double.
- 1Lead, builds the stagesGloves OffHits the current enemy with a pointer stick and raises whichever of this Lumi's ATK or DEF stage is lower by 2; if they are equal, DEF rises.
- 2First receiver, crits when fasterRaidHits the current enemy. Always crits if this Lumi's attack speed is higher than the target's.
- 3Second receiver, cashes in LeechBlooming FlowersHits the current enemy and removes all its Leech; +40% power for every 1 stack removed.
A forced swap. Parting Gift only fires on a switch you choose, so a roar that drags Sandlord out passes nothing and the Energy is gone. Cleansing Wind resets every stage on the field after the hand-off, and Mimic copies them for 3 Energy. Water, Grass, Ice and Brawler hit Sandlord for double on 85 HP.
Stages reset when the receiver leaves the field, so pick one sweeper and keep it in.
Sandlord - Variant for Sandlord: on a tie its Gloves Off raises ATK first, so a single cast already passes 2 ATK stages.
Rhiniron as the receiver: Carefree adds 60% power to its melee skills, and every DEF stage Sandlord passes cuts the recoil.
Screamhog - Variant for Sandlord, running Baton Pass: its signature adds an ATK and a DEF stage per cast, but costs 5.
Built around UnicornChampionship Flicker RushLumi Championship · Gym battles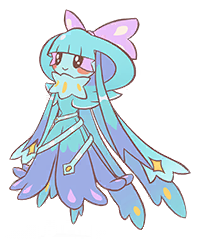 1Jellistel
 Magic Trick
 2Geniphant
 Flicker Assist
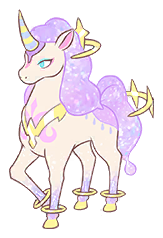 3Unicorn
 Mimic
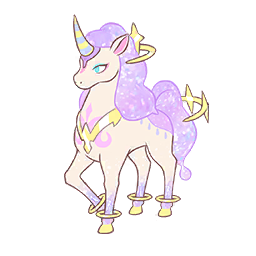
A Fairy Flicker team for the guild Gyms. Every Flicker skill Jellistel and Geniphant cast makes Unicorn's Rainbow Convergence 1 Energy cheaper, from 7 down to a floor of 2, so by the time Unicorn comes in its 100-power signature costs almost nothing. Jellistel leads and takes the first hits, coats the squad in Wet with Hydroblast, and heals 20% every time it leaves the field.
Lead Jellistel and cast two Flicker skills before Hydroblast, so the whole squad takes 2 Wet instead of 1. Magic Trick (3 Energy) swaps Flicker effects and counts with the enemy, which steals the count from another Flicker team. Geniphant follows with Flicker Assist: each one adds to the count, and Dream Walker hands back 1 Energy. Unicorn goes in last and fires Rainbow Convergence at the discount. Mimic copies the enemy's ATK and DEF stages if they have been buffing.
- 1Lead and tank, Wet for the squadMagic TrickSwaps Flicker skill effects and counts with the current enemy.
- 2Support, feeds the Flicker countFlicker AssistCasts a random Flicker skill. Builds no extra Flickergy.
- 3

Poison teams and fast Steel teams. Check a Gym's defenders before you spend a Can on this team. An enemy Magic Trick can also swap your Flicker count away. Dark hits Unicorn for double, so Muskyx and Infernadra's status team is a bad draw, and Hypnotize pins your lead in place.
Built around Bluesaur GomaDragon Roar Armour BreakPvP · Arena ladder1PsykatHypnotize2Bluesaur GomaDragon Rage3CharigonDragon Rage

Every member cuts DEF, and two of them cash the cuts in with Dragon Rage. Charigon strips 2 DEF stages from the enemy as it enters, Bluesaur Goma's roar drags in their lowest-HP Lumi and Meowgon takes 1 stage off it on arrival, and each Dragon Rage lowers one more stage while gaining 20% Pierce for every stage already lost. Psykat opens by putting a sturdy enemy to sleep so the target can't swap out of the cuts.
Open with Psykat. If the enemy lead is tanky but hits softly, Hypnotize it so it can't swap out. Bring in Charigon: Draconic Terror cuts 2 DEF stages on entry and Flaming Breath puts Burn on their whole squad. Switch to Bluesaur Goma and roar to drag in their lowest-HP Lumi, which arrives a stage down. Once a target has lost three or more DEF stages, spend on Dragon Rage from either Dragon.
- 1
- 2DEF cutter, roars in the weakestDragon RageHits the current enemy and lowers its DEF by 1 stage. Every DEF stage it has lost gives this hit 20% Pierce.
- 3Finisher, cuts on entry and piercesDragon RageHits the current enemy and lowers its DEF by 1 stage. Every DEF stage it has lost gives this hit 20% Pierce.
Anything that resets stages, and time. Meowgon takes 1 DEF stage per entry since the October patch, so reaching three stages down takes an extra cast and gives the enemy time to swap out. Cleansing Wind wipes every stage on the field and undoes the cuts, and a target that gets swapped out sheds them. Grass and Dark hit Psykat for double, so a lead of either type forces it out early. Ice, Dragon, Fairy and Royal hit both Dragons for double, and Zaphound paralyses your roarer every time it is dragged in.
Watch the enemy's Shield and their swap animation before you cast. A Dragon Rage into a fresh Shield, or into a Lumi already leaving, is 5 Energy thrown away.
Led by MuskyxTrap and Force-SwapPvP · Arena ladder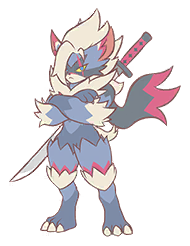 1MuskyxPoison Swamp
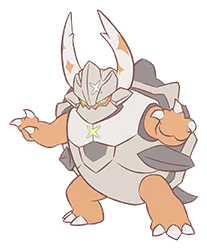 2RochelonEarth Spike
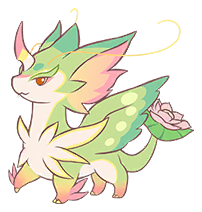 3Floragon
 Dragon Roar
Two traps go down on the enemy's side, then Floragon keeps dragging fresh Lumi across them. Poison Swamp and Earth Spike each cost 3 and deal no damage; once both are down, every enemy that comes in takes 10% of its max HP and 1 Poison, and Floragon's Bloom trait adds a Leech while it is on the field. Dragon Roar forces the current enemy off for another 3, and the swap wipes any stat stages it had built, so setup Lumi lose their buffs every time.
Poison Swamp on turn one, then Rochelon for Earth Spike before anything else. Floragon comes in last and roars whenever the enemy's current Lumi has stacked stages.
- 1Lead, lays the poison trapPoison SwampDrops a Poison trap where the current enemy is standing, applying 1 Poison to any enemy Lumi that moves onto it.
- 2Second, lays the damage trap and soaks hitsEarth SpikeDrops a trap where the current enemy is standing. Any enemy Lumi that moves onto it loses 10% of its max HP.
- 3
Ice, first. Floragon takes 4x from Ice and Rochelon 2x, and one Hail lands on every Lumi on the field, which removes the anchor before the traps pay off. Losing any one member ends the plan, since it needs both traps and the roar. Healing Light cures Poison across a whole squad, and a bench near full HP has little to fear from a roar.
Skip it against burst teams that end fights fast: Dragon Roar hits for 10 power, so the plan needs a long fight.
Bluesaur Goma for Floragon: the same 3-Energy roar, but it drags in the enemy's lowest-HP Lumi and Meowgon cuts a DEF stage on every entry. You lose Bloom's Leech; Ice hits it for 2x, not 4x.
Muscledog for Rochelon: sturdier at 106 DEF, but no trap, so only Poison Swamp fires.
Stellalibra for Rochelon, running Fortify: trades the second trap for a Lumi that hits back.
Built around StellalibraFortify StallPvP · Arena ladder1RainbowdeerHealing Light 2Stellalibra
 Fortify3Psykat
 Dreamy
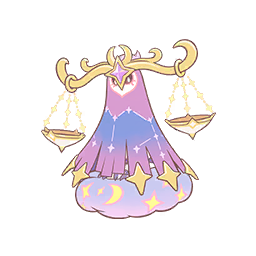
Rainbowdeer walls the front while Stellalibra stacks Fortify, and Psykat never has to come in at all. Fortune cuts the enemy's ATK 2 stages when Rainbowdeer enters and Healing Light tops the squad up 15%, which buys Stellalibra the turns to cast Fortify again and again; each cast adds a stage of ATK and DEF and banks a Star for Whirl of Judgment. Psykat waits on the bench as insurance.
Lead Rainbowdeer and heal whenever the squad dips. Switch to Stellalibra once the enemy's ATK is cut and cast Fortify until its stages win the trade, then swing with Whirl of Judgment. Keep Psykat in the last slot: the first time any of your Lumi drops below half, Dreamy heals it 30% and puts the enemy to sleep.
- 1Lead, tank and second healerHealing LightHeals every Lumi in your squad for 15% of max HP and cures all their Poison.
- 2Carry, stacks stages and sweepsFortifyRaises this Lumi's ATK and DEF by 1 stage each.
- 3Bench insurance, never sent inDreamyUp to 1 time per battle: when any Lumi in your squad drops below 50% HP, it heals 30% of its max HP and puts the current enemy to sleep. Each additional Psychic Lumi in your squad heals a further 10%.
Forced swaps, first. A roar pulls Stellalibra out and every Fortify stage is gone, so trap teams with Dragon Roar or Bluesaur Goma are the worst matchup. Cleansing Wind resets every stage on the field at once. Fire, Electric and Royal hit Stellalibra for double, and Loongster's Rough Spot is half Fire. Dreamy only fires once, so a second burst goes unhealed.
It carries you up the lower ranks, but near the top most squads pack a roar or Cleansing Wind, so keep a second team. A failed Whirl of Judgment also heals the enemy 30%, and the plan needs several quiet turns to stack.
Hexdeer for Rainbowdeer: the same Fortune and Healing Light on a smaller body, if you haven't evolved it yet.
Led by JolkatHazard RushPvP · Arena ladder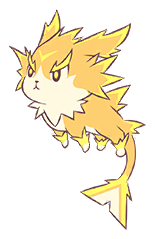 1JolkatStatic Field
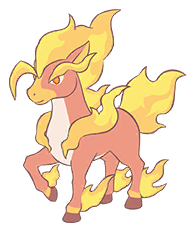 2InferazeFire Vortex3FloragonDragon Roar
A faster cousin of the poison trap team. Jolkat lays Static Field and Inferaze lays Fire Vortex, so every enemy that comes in picks up Paralysis and Burn on arrival, and Floragon's Dragon Roar keeps dragging new ones across. Volt Absorption gives your side 0.1 extra Energy for every attack on a Paralyzed target, and Inferaze's Flaming Body burns back anything that hits it with a skill while it carries Burn itself.
Static Field first, then switch to Inferaze for Fire Vortex. Floragon comes in last and roars whenever a buffed or dangerous Lumi is in front of it, so each swap-in eats Paralysis, Burn and a Leech from Bloom.
- 1Lead, lays the Paralysis trapStatic FieldDrops a Paralysis trap where the current enemy is standing, applying 1 Paralysis to any enemy Lumi that moves onto it.
- 2Second, lays the Burn trap and tanksFire VortexDrops a Burn trap where the current enemy is standing, applying 1 Burn to any enemy Lumi that moves onto it.
- 3
Ground, which hits both Jolkat and Inferaze for double, and Ice, which hits Floragon for 4x. Rochelon shrugs it off too: Earthen Stomp clears Burn and Paralysis from itself before it hits.
Pick it over the poison trap team against squads built on Healing Light, which cures Poison but leaves Burn and Paralysis alone. Pick the poison version when you want Rochelon's bulk in the middle.
Built around BloomveilLeech BladePvP · Arena ladder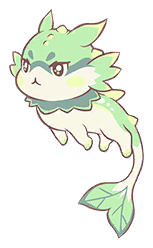 1LeafkatVine Bind
 2Glasnake
 Paralyzing Current
 3BloomveilFortify
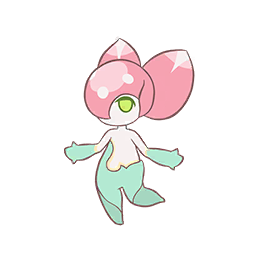
Everything here piles Leech on the enemy so Bloomveil can sweep. Leafkat drops Vine Bind, a Leech trap, and Sprout gives your whole side 30% more crit rate against Leeched targets while it stands. Glasnake paralyses with Paralyzing Current, and its Mystic Chime copies one stack of every status on the target to the rest of the enemy squad. Bloomveil's Calyx sets its DEF stage equal to the Leech on the enemy, and Fortify stacks ATK on top.
Vine Bind first, and keep Leafkat alive as long as you can, since Sprout only works while it stands. Glasnake next: Paralyzing Current on the target, then Mystic Chime to copy its statuses across the squad. Bloomveil comes in once most enemies carry Leech and casts Fortify before it attacks.
- 1Lead, sets the Leech trapVine BindDrops a Leech trap where the current enemy is standing, applying 1 Leech to any enemy Lumi that moves onto it.
- 2Second, spreads status across the enemy squadParalyzing CurrentHits the current enemy with an electric wave and applies 2 Paralysis.
- 3Endgame sweeper, tanks off LeechFortifyRaises this Lumi's ATK and DEF by 1 stage each.
Anything that clears Leech, because Bloomveil's DEF drops the moment the stacks go, and a fresh swap-in carries none until it crosses Vine Bind. Fire, Flying, Ice and Dark hit both Leafkat and Bloomveil for double.
Cleansing Wind also resets Bloomveil's Fortify stages, so watch for Stellalibra or Gambir on the other side.
Glasnake can run Leech Seed instead of Paralyzing Current: more Leech for Bloomveil, less control.
Built around Flamblades + InferazeFlamblades & BurnIn-game line-up · Burn-fed crit rotation1RainbowdeerCall for Help2FlambladesRaid3Inferaze Absorb Fire
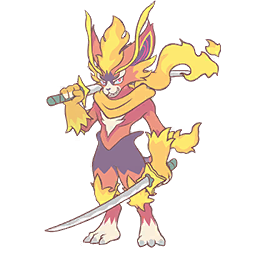 Core LumiFlambladesSFlamblades rises to S because ladder teams now plan around it, leading Glasnake with Shield or holding Dragon Roar to survive its opening. Burn feeds Swift and Swift makes Raid a guaranteed crit, though four double weaknesses on 88 DEF make it easy to punish.
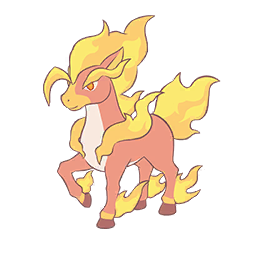 Core LumiInferazeAInferaze is A because Fire Vortex lays the hazard rush team's Burn trap while Flaming Body, fed by Blazing Hooves, makes it immune to Burn and burns back every skill that hits it. 85 ATK grinds rather than kills; Flamblades brings the damage.
Burn does three jobs in this line-up. It chips the enemy down, it is where Flamblades gets its speed, and it is what keeps Inferaze alive. Hasty Flames gives Flamblades 1 Swift whenever it applies Burn, Fireblade Assault adds another for every 2 Burn on the target, and Raid always crits when Flamblades attacks faster than its target. Two Swift put it ahead of even the 0.8s Lumi like Zaphound.
Lead Rainbowdeer so Fortune cuts the first enemy's ATK by 2 stages, then Call for Help sends Flamblades in with +1 ATK. Open with Fireblade Assault, then Raid. When Flamblades is in danger, switch to Inferaze for Blazing Hooves: 2 Burn on each side, and Inferaze takes no Burn damage while burning back whatever hits it. After a few hits, Absorb Fire clears every stack for 5% max HP each and cures Leech.
- 1Lead, cuts ATK and hands offCall for HelpHits the current enemy and switches out; the Lumi coming in gains +1 ATK stage.
- 2Carry, turns Burn into critsRaidHits the current enemy. Always crits if this Lumi's attack speed is higher than the target's.
- 3Anchor, burns back and heals off BurnAbsorb FireRemoves every Burn stack from this Lumi and the current enemy, healing 5% of max HP per stack removed; then cures this Lumi's Leech.
Ground hits all three for double, and Water hits both Fire Lumi. Flamblades is the one a fast Brawler or Royal Lumi knocks out before its Swift is up, so save Shield for its entry turn. A Fire mirror is awkward too: an enemy Fierikat heals its allies 4.5% whenever they gain or apply Burn, so your stacks feed them.
Absorb Fire wipes the enemy's Burn too, so never cast it while Flamblades still needs those stacks.
Hexdeer for Rainbowdeer: the same Fortune and Call for Help on a smaller body, if you haven't evolved it yet.
Built around Zoryx + SunbelleZoryx & CRITIn-game line-up · Harsh Sunlight crit burst 1Sunbelle
 Clear Skies
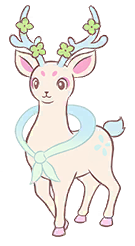 2HexdeerCall for Help
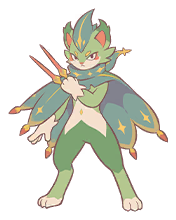 3ZoryxFocus Blast
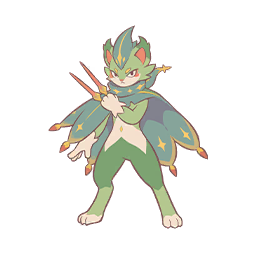 Core LumiZoryxBZoryx ranks B because the crit stacks from Nimble and Maple Dart take turns to build before they discount Focus Blast, on 96 ATK. A 4x Flying weakness often ends it first.
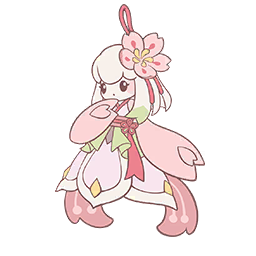 Core LumiSunbelleBSunbelle is B for sun teams: Sunshine cuts your side's damage taken in Harsh Sunlight and its signature lifesteals there, on 105 DEF. A 4x Dark weakness is the catch that keeps it out of A.
Sunbelle sets Harsh Sunlight and Zoryx cashes it in. The weather adds 20% to Grass damage, and Zoryx's Maple Dart is a Grass move: three needles that can each crit, helped by Nimble's extra 25% crit chance on every attack. Each crit raises Zoryx's ATK by a stage once the throw ends, and each stage makes Focus Blast 1 Energy cheaper. Sunbelle's Sunshine also cuts the damage your whole side takes by 15% while the sun is up and Sunbelle is still standing, bench included.
Lead Sunbelle and cast Clear Skies straight away. It sets the sun, hits every enemy on the field and puts 1 Burn on each. Switch to Hexdeer, whose Fortune lowers the enemy's ATK by 2 stages on entry, then use Call for Help to send Zoryx out with +1 ATK, so its first Focus Blast already costs 4. Open Zoryx with Maple Dart to build stages and spend them on Focus Blast, which drops a stage after each cast, so alternate the two.
- 1Lead, sets the weatherClear SkiesSets the weather to Harsh Sunlight, hits every enemy on the field and applies 1 Burn to each.
- 2Middle, cuts ATK and hands offCall for HelpHits the current enemy and switches out; the Lumi coming in gains +1 ATK stage.
- 3Finisher, stacks crits into ATKFocus BlastHits the current enemy with a ki blast. Costs 1 less Energy per positive ATK stage; afterwards this Lumi's ATK drops by 1 stage.
Fire. The sun boosts Fire damage by 20% as well, and Fire hits both Zoryx and Sunbelle for double, so against a Fire team your own weather works against you. Beyond that, Flying hits Zoryx for 4x and Dark hits Sunbelle for 4x.
Any other weather replaces yours. If the enemy runs Gambir's Storm Strike or Rimedeer's Frostspike, Sunshine and the Grass boost both switch off until Sunbelle comes back in and casts Clear Skies again.
Rainbowdeer for Hexdeer: the same Fortune and Call for Help on a bigger body, 100 DEF and 100 HP.
Built around EchofrogJellistel & RotationIn-game line-up · Stall rotation into Echofrog1HexdeerCall for Help2JellistelWater Retreat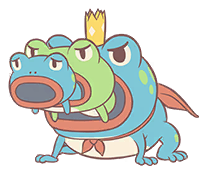 3Echofrog
 Ice Shards
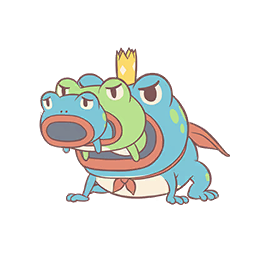
The first two Lumi buy time. Every time Hexdeer comes in, Fortune takes 2 more stages off the enemy's ATK, and every time Jellistel leaves, Regenerate heals it 20%. Both carry a skill that attacks and switches out, so they can trade places for several turns while the enemy's damage keeps shrinking. Echofrog is the payoff. Echo fires one more water bullet each time it's cast in a row, up to three, and Round adds 1 Wet whenever Echofrog's skills deal damage, so each follow-up costs 1 Energy less.
Lead Hexdeer, then Call for Help into Jellistel. Water Retreat hits and sends Hexdeer back in, so Fortune fires again and Jellistel heals on its way out. Keep trading until the enemy's ATK sits at -5, the floor, where it is halved, or until one of the pair runs low. Then Water Retreat into Echofrog so it arrives with 1 Wet, and cast Echo three times in a row.
- 1Lead, lowers ATK on every entryCall for HelpHits the current enemy and switches out; the Lumi coming in gains +1 ATK stage.
- 2Partner, heals on every exitWater RetreatHits the current enemy and switches out; the Lumi coming in gains 1 Wet.
- 3Finisher, fires Echo on repeatIce ShardsHits the current enemy twice; each hit has a 20% chance to apply 1 Frostbite.
Electric and Grass hit both Jellistel and Echofrog for double, and Dark hits Jellistel too. Switching also works against you here. Stages reset when a Lumi leaves the field, so an opponent who swaps out wipes every ATK stage you took off, and the next Lumi arrives at full strength.
Echo's bullet count resets the moment Echofrog leaves. Once it starts firing, stay in, and put Shield on its first turn so the setup isn't punished.
Rainbowdeer for Hexdeer: the same Fortune and Call for Help on a bigger body, 100 DEF and 100 HP.
Built around RegaffinStorm & RegaffinIn-game line-up · Storm burst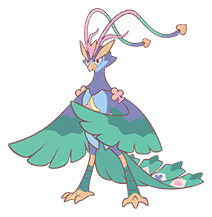 1GambirStorm Strike2Charigon
 Tail Whip3Regaffin
 Dragon Charge
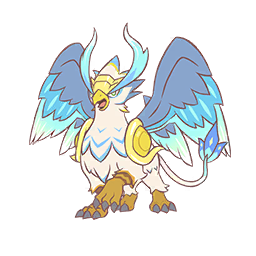
Everything here serves Regaffin, and Regaffin needs Storm. While Storm is up, Flying and Dragon damage are 20% higher, Fast & Flurrious gives Regaffin 50% more crit rate, Swift Storm drops from 6 Energy to 4 and Dragon Charge from 8 to 5. Swift Storm lands five strikes and every one of them gets the crit bonus. Gambir sets the weather and Charigon strips the enemy's DEF before Regaffin arrives.
Lead Gambir and cast Storm Strike. It sets Storm, hits every enemy on the field and resets your switch cooldown, so you can swap straight away. Bring in Charigon: Draconic Terror takes 2 DEF stages off the enemy on entry, and Tail Whip takes a third before Charigon switches out into Regaffin. Put Inspire on Regaffin's first Swift Storm for 80% more damage.
- 1Lead, sets StormStorm StrikeSets the weather to Storm, hits every enemy on the field and resets your switch cooldown.
- 2Middle, strips DEF and leavesTail WhipHits the current enemy, lowers its DEF by 1 stage and switches out.
- 3Finisher, crits in StormDragon ChargeRams the current enemy. Costs 3 less Energy during Storm.
Ice hits all three for double, and Electric hits Gambir and Regaffin. Weather is the other weak point. If the enemy sets Harsh Sunlight or Snow, Regaffin loses both discounts and the crit rate until Gambir comes back and restores Storm.
The DEF stages Charigon strips stay only while that enemy stays in. If the opponent swaps, the new Lumi arrives at full DEF and the setup turn is wasted, so time Charigon for a Lumi that is likely to stay.
Timed right, one Swift Storm with Inspire can knock a Lumi out in a single cast, which is why Regaffin is S on our tier list.
Built around MuskyxDebuffsIn-game line-up · Status stacking into Entrenched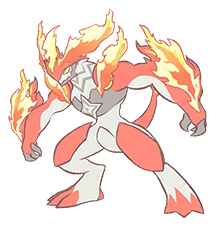 1Infernadra
 Scorch2GlasnakeHypnotize3Muskyx
 Entrenched
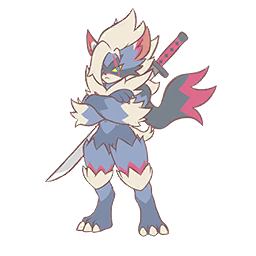
Muskyx's Entrenched costs 7 Energy and hits for 120, but it costs 1 less for every different status on the target, down to 2. The first two Lumi exist to fill that count. Infernadra puts on Burn and Leech and knocks DEF down while doing it, Glasnake puts the target to sleep, and Muskyx adds Poison plus one random extra status from Poison Master. That is up to five different effects before Entrenched is cast.
Lead Infernadra with Born from Fire, which lands Leech and Burn and lowers DEF, and Burning Pain takes a second DEF stage whenever Burn goes on. Follow with Scorch for 2 more Burn. Swap to Glasnake and cast Hypnotize. An Asleep Lumi can't be switched out manually, so the enemy is stuck in front of you with every stack still on it. Then Muskyx: Gale Slash applies Poison and, through Poison Master, one more random status, and Entrenched follows at 2 or 3 Energy.
- 1Lead, stacks Burn and lowers DEFScorchHits the current enemy and applies 2 Burn to it and 1 Burn to this Lumi.
- 2
- 3Finisher, cashes in the statusesEntrenchedHits the current enemy with shadow; costs 1 less Energy for each different status effect it carries (up to 5 less).
Anything that clears statuses, since each one removed makes Entrenched 1 Energy dearer. Rainbowdeer and Hexdeer both clear their own with their signature skills. Light hits Muskyx, the finisher, for double.
The damage all arrives at the end. Infernadra has 82 ATK and Glasnake's skills hit for 20, so against a team that ends fights quickly this one can lose before Entrenched is ever cast. Keep Shield for Muskyx's first turn.
Psykat for Glasnake in the Arena: the same Hypnotize, plus Dreamy's one-time 30% heal. Run Dragon Roar on Infernadra and Infect on Muskyx to spread the statuses.
Built around LycaniteLycanite CoreIn-game line-up · Swift stacking into Lycanite 1Latteccino
 Speed Up2Flamblades
 Relay
 3LycaniteFortify
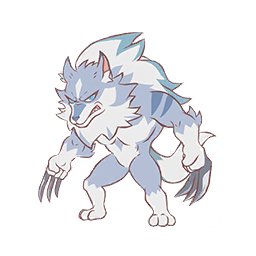
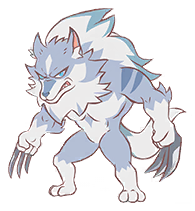
Lycanite's Deadly Claw always crits once Lycanite holds 3 Swift, and strikes a second time at 5. The other two are there to get it to that count. Latteccino's Speed Up gives 1 Swift to every Lumi in your squad, bench included. Flamblades makes Swift out of Burn, 1 each time it applies Burn plus 1 for every 2 Burn on the target, and its Relay hands every stack it holds to the Lumi that switches in.
Lead Latteccino, cast Speed Up and switch out. Refill heals it 20% and adds 2 Energy as it leaves. Flamblades casts Fireblade Assault two or three times to build Swift, then uses Relay to send Lycanite in, which already holds 1 Swift from Speed Up. Three Swift means every Deadly Claw crits, and five adds the second strike. With spare Energy, cast Fortify (3 Energy, +1 ATK and DEF) before the first Claw.
- 1
- 2Middle, builds Swift and passes itRelayHits the current enemy and switches out, handing all of this Lumi's Swift to the Lumi coming in.
- 3
Brawler and Royal hit all three for double, and Fire hits both Steel Lumi. A forced swap is the other problem, since Fortify's stages reset when Lycanite leaves and the whole setup is built around keeping it in.
Self-Heal is Lycanite's safety net. Below half HP its basic attacks heal it for all the damage they deal, and the first time it drops under half it gains 1 more Swift.
Built around Rimedeer + CrysionFrost Claw LockIn-game line-up · Frostbite Energy tax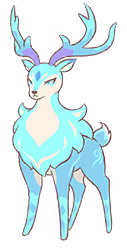 1Rimedeer
 Ice Shard
 2CrysionIce Shard
 3Bowlguin
 Wave
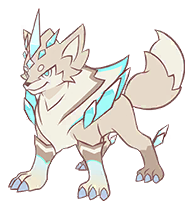
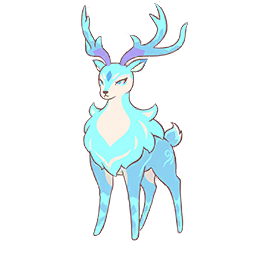 Core LumiRimedeerARimedeer holds A as the Snow setter for Ice teams: Spirit of Snow frostbites every attacker and Frostspike sets Snow for the team. At 40 power the signature is setup, not damage, which Skollfang supplies.
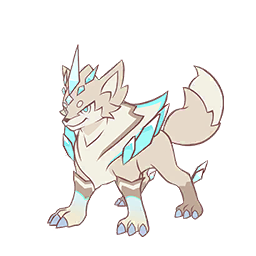 Core LumiCrysionACrysion holds A with Frost Claw raising enemy costs once every enemy has enough Frostbite, and 106 ATK to close. Skollfang taxes per stack with no threshold, which is why it sits higher.
Three Ice Lumi turn Frostbite into an Energy tax. With all three in the squad, Rimedeer's Frostspike costs 3 instead of 6 and sets Snow, which raises Ice Shard from 1 Frostbite a cast to 3. At 5 stacks, Crysion's Frost Claw makes the enemy's skills cost 3 more Energy while Crysion stays in, and each stack adds 15 power to every skill that hits it. Bowlguin's Wave is the Water answer to the Fire Lumi that threaten the other two.
Lead Rimedeer, open with Frostspike for Snow, then cast Ice Shard for 3 Frostbite at a time; enemy skills that hit Rimedeer add more through Spirit of Snow. At 3 to 5 stacks, switch to Crysion with Shield up. Frigid Pierce hits for 100 power plus 15 per stack and heals Crysion 20% on a knockout.
- 1Lead, sets Snow and stacks FrostbiteIce ShardHits the current enemy and applies 1 Frostbite — 3 during Snow.
- 2Finisher, taxes Energy and closesIce ShardHits the current enemy and applies 1 Frostbite — 3 during Snow.
- 3Answer to Fire, cheapens the next castWaveHits the current enemy with +15 power per Wet stack on this Lumi. If it has no Wet, it gains 2 Wet instead.
 Core
Fire, Brawler and Steel hit all three for double, and Snow boosts Brawler damage too. Flamblades is the worst matchup. A forced swap such as Dragon Roar pulls Crysion out and switches Frost Claw off.
Bring Bowlguin in against Fire: its first Wave also gives 2 Wet, taking 2 Energy off its next skill. It is C on our tier list because Wheel of Fate gains or loses an Energy at random, so never plan a turn around its exact Energy.
On the ladder this answers roar-and-trap teams: Ice hits Floragon for 4x and Rochelon, Charigon and Bluesaur Goma for double.
Muskyx for Bowlguin: Poison Master adds a random second status with every Poison, and Avalanche hits once more for each different status on the target, up to 5 hits for 3 Energy.
loadoutgg is not affiliated with, endorsed by, or sponsored by Bilibili Games or the creators of Lumi Master. Lumi Master and all Lumi names, art, and other assets referenced here are trademarks and copyrighted material of their respective owners, shown, as on other game companion sites, only to identify the games and characters covered here. The classification, skill and ability text, and other compiled game data on these pages are loadoutgg's own work — extracted from the game's own files and official sources and rewritten in our own words. This compilation is not offered for reuse; please link to loadoutgg rather than copying or scraping it. Full copyright and licensing details: loadoutgg.com/legal.